Chicks
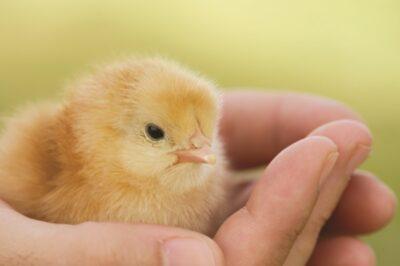
There’s nothing that hints of spring quite like newly hatched chicks. If you haven’t ordered yet, now is the time to do so, either through a nearby breeder, the local feed store or a mail order hatchery. You’ll also want to have your brooder set up so you’re all ready to go when that peeping box of precious fuzz arrives.
Choosing the Perfect Chicken Breed
There are so many different breeds of chickens to choose from that it can be quite intimidating to get started. Determine what you’re most interested in: egg laying, meat producing, broodiness (setting and hatching eggs), or ability to forage. Some breeds offer a nice balance of all of these characteristics and seem to suit homesteaders quite nicely. Over time you may develop a personal favorite, but look into trying Buff Orpingtons, Wyandottes, Barred and Plymouth Rocks, Delawares, Rhode Island Reds, New Hamshires, Sex-links, and Old English Game birds. The temperaments differ somewhat from breed to breed, some having more tenacity or flightiness, some more docile and calm. Overall, these breeds produce a mixture of eggs and meat quite admirably. If you want to brood multiple hatches of eggs a year, consider adding a Silkie to your flock. These bantams (smaller sized than average chickens) are extremely broody in nature. In fact, it’s not just the hens; Silkie roosters have been known to occasionally “go broody.” With having a dedicated brooder, this will free your other hens up to lay eggs continually.
The Most Valuable Household Substance In The World!
Mix it up
Consider ordering several different breeds at the same time. If you keep any flock for an extended period of time and hatch out your own chicks, inbreeding occurs and the quality of your chickens can decrease with each new generation. If you order several different breeds, the gene pull is larger and allows for higher quality birds to be maintained over time. Another way to handle this is to periodically add a new rooster to your flock (though, it goes without saying that you’ll need to remove the older one first).

Chicks
When ordering your chicks, some hatcheries allow you to pick out the sex of your chicks. Unless you choose a sex-linked breed, determining the sex of baby chicks is difficult. Sexing practices are becoming more sophisticated and more reliable than in the past, but don’t be surprised if you end up with a rooster or two in your batch of pullets. It happens.
Getting the Brooder Ready
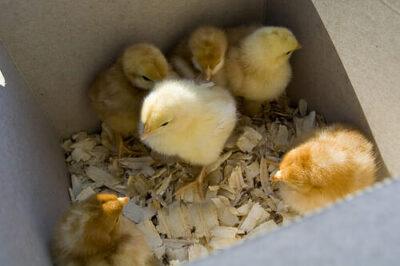
With breeds chosen and the arrival of your chicks days away, it’s time to set up your brooder. You can construct a brooder from any number of supplies or order a ready-made one. Shipping crates, large and sturdy cardboard boxes, plastic storage bins, plywood box constructions and more all work admirably as brooders. Basically you need an area to contain your chicks (and keep out predators or pets) in a warm area with food and water available. There are a variety of ideas and plans on the Internet for constructing your own chicken brooder, so do a quick search and find something that will work best for your situation.
Chicken brooders can be set up in chicken houses and barns (as long as no other animals, including other chickens, can get to them and the temperature can be maintained) or in your home. My family spent many springs with our brooder tucked away in the corner of our kitchen. The chicks’ cheerful little peeps kept us company until we moved them outside once they were old enough.
Story continues below video
Once you have your brooder constructed, sprinkle the floor with pine shavings. Pine sawdust is okay after the first week. Before that the chicks may try to eat it. Never use cedar shavings as these are poisonous and will kill if ingested. Hang your heat lamp and place a thermometer on the floor of the brooder where the chicks will be. The temperature should hover close to 91.4 degrees Fahrenheit. Adjust the height of the heat lamp or change the bulb until you reach this temperature. You’ll want to ensure also that the brooder is large enough so the chicks can get out from under the heat lamp if they become overheated. In the spring, outdoor temperatures can fluctuate quite a bit, so check your brooder often. If the chicks are huddled densely together under the heat lamp, they are probably too cold. If they’re scattered out to the far reaches of the brooder, they’re probably too hot. Every couple days, decrease the heat in the brooder by lifting the heat lamp up.
Story continues below video
Provide chick feed in a shallow dish and water in a chick waterer. If your waterer is fairly large, you’ll probably want to place stones into the water trough so that the chicks can’t fall in and drown themselves. You can start your chicks off with sugar water although it isn’t always necessary. Place about one teaspoon in a quart to a gallon of water. Extended use of sugar water can lead to pasty butt in chicks, so use it only in the beginning few hours or if a chick gets chilled or stressed at some point.
When the Chicks Arrive
When your chicks arrive, take them to your brooder. The heat lamp should have already been on, so you can place them in their new, warm home right away. Take each chick and check them over briefly for any travel injuries and pasty butt. Dip their beaks into the water and place them next to the chick feed, or even standing in the dish. Chicks learn quickly, but they don’t know what is food and water at first. Once you’ve checked all the chicks over and introduced them to their food and water, let them rest. They’ve had a stressful journey, but they should perk up fairly quickly.
Grow Your Own Herbs For Survival Remedies
Maintenance
You’ll want to check your brooder frequently the first couple days to ensure everyone is okay and the temperature is comfortable for the chicks. It isn’t uncommon for a chick or two to be lost if they’re shipped through the mail. Discard of these right away and keep an eye on the rest of your chicks. Contact the seller or hatchery if you start losing more chicks. But chances are, you won’t have any problems and you’ll be able to enjoy your chicks’ contented peeping noises emanating from their brooder. In the days and weeks ahead, little wing feathers will appear and the roosters’ combs will start to flesh out. Soon your little brood will be ready for their first introduction to the great outdoors!
If you have any other tips, please share them in the comments below!


