If you decide to store food or if you perhaps want to preserve the food you’ve grown, you need to keep in mind that diversity is the keyword. While we can survive eating the same food day after day, that can hardly be called living, and you need to make sure appetite fatigue never occurs.
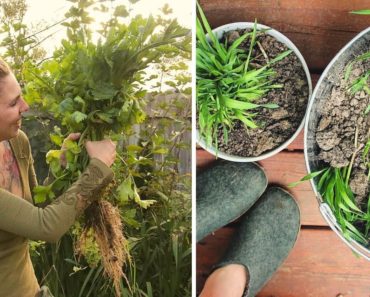
Growing and storing herbs is highly recommended if you want to prepare tasty meals using the staple foods you’ve stockpiled. Many herbs can be grown easily, and their preservation can be done right after being harvested. Even more, increasing your herbs provides you with high-quality seasonings that are both fresh and organic. You need to learn how to experiment with the herbs and perhaps create your custom blends for cooking.
The basics
When drying herbs and spices, we must understand how to use these seasonings and differentiate them. First, culinary herbs are defined mainly as leaves, while spices originate from roots, bark, berries, seeds, fruits, and buds. And second, spices are used only (or mainly) in dried form compared to herbs which can be used both fresh or dried.
If you want to preserve your homegrown herbs, you have to pick the right time for harvesting. The best time to pick the herbs is midmorning before the essential oils in the leaves are burned by the sun.
Wait for the dew to dry and pick the herbs as needed, and make sure to remove the dead, diseased, wilted, or old leaves. Some may decide to wash the herbs, but this is not necessary if you’ve grown them organically.
If you plan to harvest seed spices, you have to wait until the seed heads begin to turn brown. Besides a change of color, the seeds head will also start to harden and develop a paper-like texture. You will need to figure out when it’s the best time to pick the flower heads, and you should do so before the seeds heads are ready to shatter.
When harvesting herbs for their flowers, you have to snip the flower buds off the plants in the first days the buds start to open.
To preserve the herbs, you need to remove all the moisture that will lead to bacteria, yeast, and mold buildup. You need to provide air circulation and warmth in some cases, so the following herb drying methods are highly recommended.
Airdrying indoors
To air-dry herbs, you can tie stems in bundles and hang those stems upside down in a dry and warm place. It’s recommended to avoid using your kitchen and find another room that doesn’t produce steam or cooking vapors.
You will have to tighten the herbs bundles as the stems dry, and you also need to wrap them with muslin, a mesh or paper bag with several holes, and tie it at the neck. This becomes mandatory to collect and avoid losing any falling leaves or seeds.
If you have to dry individual leaves, sprigs, or flowers, you will have to improvise a drying screen using whatever is available at home. You can use a window screen or mesh and staple it to a wooden frame. Now place cheesecloth over the screen and lay the herbs on the cloth.
The drying time can vary from a few hours to a few days depending on the air circulation and temperature in the drying room.
Solar drying
Warm and dry weather is ideal for drying herbs, and you should aim for 100 degrees and 60% humidity or less. However, the trick with solar drying is to avoid exposing the herbs to too much sunlight because they might bleach.
You can place the improvised drying screens outside and wait until your herbs are brittle. The drying time will vary, and in some cases, you will have to bring the drying screens or rack inside at night.
There are many building plans available online for making your solar food dehydrator, so make sure to build something that can be used for other food drying purposes as well.
Drying herbs using your refrigerator
This method also works great for drying herbs, but the problem is finding enough available space in your fridge to let the herbs sit for a few days. This method requires less work from your side, and all you need to do is stick the herbs in the fridge and forget about them for a few days.
A cold and dry refrigerator will help you dry herbs, and it also helps retain their color and fragrance. This method is highly recommended to dry parsley and chives, which maintain their flavor better if frozen.
Using a commercial dehydrator
Using a food dehydrator is the preferred method of food drying for many folks since these machines are doing a great job of drying pretty much anything. The average household budget can cover the price range of food dehydrators. A quality dehydrator is anywhere from $100 to $400, and it all depends on its features. A good dehydrator should have a timer and proper adjustable temperature control.
There are round or box-type models with multiple stacking trays, and some allow you to dry large items or can be used for proofing bread dough. It all depends on your needs and budget, but you should know that, in general, you will recover its cost in two seasons of grocery savings. Follow the user’s manual when using your dehydrator for drying herbs.
Oven drying
This old method of drying herbs is still being used today since everyone owns an oven, and they all know how to use it (in theory). However, this is, in my opinion, the most labor-intensive method for drying herbs, and it’s also the least energy-efficient one.
The problem with oven drying is that you need to dry herbs at about 100 degrees, and most ovens don’t go that low. Some don’t have vents, and you need to provide air circulation for even drying. This means you have to improvise and experiment with drying your herbs and avoiding burning them properly.
You will need to get an oven thermometer, run the oven low, and turn it off. Prop the door slightly open and note how long it takes for the temperature to drop and how long it stays at 100 degrees. By doing so, you will figure out the time you will need to dry a batch of herbs (preparing the oven, actual drying time, etc.). Also, make sure you place the drying screen on a wire rack in the middle of the oven to allow air circulation.
Drying the herbs using a microwave
Your microwave can help you dry herbs successfully, but it won’t do an excellent job drying foods with high moisture content. However, the microwave will do a decent job for our intended purpose, even though it’s not as easy as using a commercial dehydrator.
To dry the herbs, start by removing the leaves from the stems and placing them between layers of paper towels. You will need a timer to ensure you are doing adequate drying cycles. Start the microwave on high power for 1 minute, then allow 30-seconds to rest. After doing so, you will need to alternate between a 30-seconds run on high power and a 30-seconds rest for 10 minutes on more.
More tips
The herbs have finished drying when the leaves no longer feel leathery. They will crumble easily, but it’s not recommended to crumble them to test if they are fully dried since whole leaves retain the flavor better.
Thoroughly dried leaves and seeds are safe from mold and bacteria, and they will retain their flavor for at least 12 months.
It’s recommended to store your herbs and spices in air-tight jars in a place away from heat or direct light. After you’ve stored the herbs, check the jars every 3-4 days for droplets of moisture or mold signs. Do so for 2-3 weeks and throw away anything that becomes moldy. If moisture is present, you will need to redry the jar’s contents.
After you’ve dried your herbs and spices, you will need to separate them and store them individually. Label the jars with the date and the type of herbs they contain.
Whole leaves hold up better, but you can also store ground blends to help you save time when cooking.
If you use dry herbs and spices in recipes that require fresh ingredients, you should use only half of the amount in dried form, and only a quarter of the herb you use is finely grounded.
Here are some examples of herbs and spices to dry, which are commonly grown in North America:
- Leaves – Lovage, marjoram, oregano, rosemary, sage, bay, celery, chervil, dill, geranium, lemon balm, lemon verbena, tarragon, thyme.
- Flowers – Chamomile, marigold, rose, thyme, yarrow, linden, bee balm, chive, dill, geranium, lavender, nasturtium.
- Seeds – Caraway, celery, dill, cumin, mustard, fennel, coriander, anise, chervil.
- Roots – Horseradish, ginger, garlic.
Concluding
If you grow your herbs and spices, it’s better to learn how to preserve them for later use if you won’t always be able to use them fresh or if the recipe requires their dried form.
Herbs and spices will make your life a lot easier if you have a limited amount of ingredients in your pantry and you lack variety. Using the fresh or dried will help you turn even the blandest food into a novelty and make surviving with the same meals a lot easier.


