Protecting yourself from the elements and keeping warm (maintaining core body temperature) is extremely important in the outdoors. Exposure has taken the lives of many people lost in the wilderness, or even in close proximity to town or a house.
It only takes a few hours – or even less – for the body to succumb to the effects of extreme weather and temperature. Your first line of defense against this should always be to wear weather appropriate clothing and footwear.
After this, one should carry some type of shelter or a tarp that can be used to construct an emergency shelter. In the situation where a shelter isn’t carried, then you must know how to make one. Even an impromptu shelter can keep you warm.
Certainly, there are many different types of outdoor shelters that can be made, all with their advantages and disadvantages. However, there is one type that even the unexperienced have most likely heard of and can construct without much difficulty: the lean to.
The Lean To Shelter

The lean to shelter is undoubtedly one of the simplest shelters to make because it requires minimum materials and know-how to construct, and it can usually be setup rather quickly.
The basic design of this shelter consists of a single wall propped up at roughly a 45 degree angle or steeper, or whatever angle you desire. The wall provides minimum protection from wind, snow, rain, and its angle allows water to run off and keeps too much snow from accumulating.
Since the lean to shelter has no other walls (it can have two small sidewalls) or a true ceiling to speak of, it doesn’t do great job of retaining heat. If a lean to is all that you can make in cold conditions, then by all means do so, but the lean to is better suited for environments with milder temperatures.
Generally speaking, the lean to shelter is meant as a quick emergency shelter, to get out of the elements for a short time, say during an approaching storm, or if you only intend on staying in an area for a night or two.
Choosing Your Campsite
The first step in setting up any shelter is to choose a good location. Listed below are a few of the top things you should keep in mind when selecting a campsite.
1. Look Up
It’s a good idea to look up once in a while and make sure there are no “widow makers” above you. In terms of the outdoors, widow makers are trees or tree branches that have a high likelihood of falling on you because of dead branches or damaged trees.

I would extend the definition to go beyond just trees and look for anything that could be a falling hazard, such as rocks.
2. Stay Away From Danger Zones

It’s also not a good idea to build a lean to – or any shelter – in dangerous zones, such as flashflood, rockslide, avalanche, and mudslide zones. Usually, there are visual environmental indicators that will inform you that you are in one of these zones. Learn them.
3. Check For Wildlife
Take the time to check around your potential campsite location for signs of wildlife or reasons that wildlife may want to frequent that area.
For example, don’t set up a shelter directly on or near a game trail or near a source of food. Also, check for insect nests, hives, and anthills. You don’t want to be woken up in the middle of the night feeling itchy because you set your shelter up ten feet away from a big anthill. (Ask me how I know this one!)

Keep Away From Water
Generally speaking, it’s not a good idea to set up a shelter right next to a water source. Water sources (large ones) have a cooling effect and if the aim is to keep your body temperature up, this will make it more difficult.

Water sources also have the potential for flashfloods, rising water levels, and wildlife visiting them.
How To Build A Lean To Shelter
Once you have chosen a good location for you shelter, you can start collecting building material. If you collect your bedding first, it will give you a good idea of how big the shelter should be.

Collect a lot of leaves, grasses, or tree boughs that will serve as your bedding. Pine boughs work very well.
It’s very important to not lay directly on the ground. It’s uncomfortable, and (more importantly) you will lose a lot of body heat. Making even a small, raised bed will make a huge difference in a survival situation.
Since a lean to is most likely going to be a temporary shelter, it only needs to be big enough so you can lay down and sit up.
If you are building everything from scratch, you are going to need three sturdy branches for the frame of the shelter. Two will be used as the supports and the third one will act as a crossbeam, or what is called the ridge pole.
If you can find two supports poles with a fork (Y shape) in them, it will make things a bit easier.
Three Basic Steps to Building a Lean To
- Stick the two support poles into the ground so that they stand straight up and the distance between them is long enough that you can lay down.
- Lay the ridge pole in the forks. If the side poles do not have a fork, use cordage to lash the ridge pole to the two poles that are supporting it.
- Find straight branches that can be leaned against the crossbeam at an angle, you are going to need quite a few of these as they will be forming the wall. The outside of the wall needs to face the windward side, this is the direction in which the prevailing winds are blowing at you.
Waterproofing a Lean To Shelter

A lean to shelter isn’t going to be 100% waterproof since it has one side that is open, but a few things can be done to help keep you dry inside.
The first thing is to keep the shelter out of low depressions or areas where water may collect.
Next, shingling the outside of the roof will help rain water run down the outside of the shelter rather than in it. This is easy enough to do by overlapping leaves, green branches, grasses, moss, large pieces of bark or any other material that can be used as roofing material. Packing a plastic sheet or tarp makes this process a whole lot easier and effective.
The best way to do this is to overlap the roof materials by starting at the bottom and working your way upward. The shingle material should overlap the previous section that is below it.
If you have the extra time and materials, shove any biomass or mud that you can find into the cracks of the frame. This will help to further waterproof and windproof those sections.
Staying Warm in Lean To Shelters
Due to its design, a lean to shelter isn’t the warmest shelter out there, but there are several things that can be done to stay relatively warm inside of one.
First, if you take the time to properly insulate and waterproof the shelter, as mentioned in the previous section, it will help to keep you dry and prevent the wind from whipping through it.
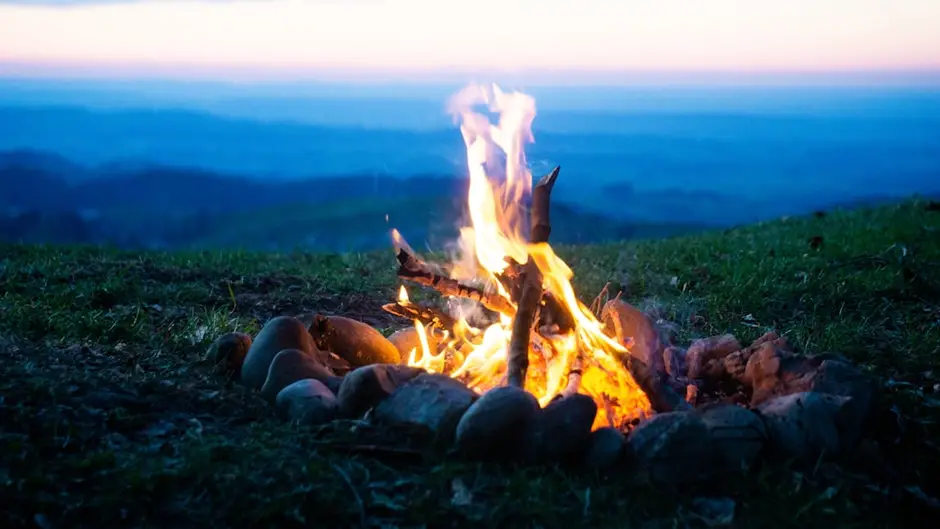
The second thing you can do is build a fire. A large lean to can have a fire inside it, but most emergency lean tos aren’t going to be that large.
To stay safe, a bigger fire should be built just outside of the shelter. By adding a fire reflector – or reflector wall – just behind the fire, more heat will be reflected back into the shelter.
These walls are quick and fairly simple to build as they consist of four posts with branches jammed in between them.
Thirdly, if you have a mylar emergency blanket, it can be stretched out to form a reflector wall around a fire or it can be hung on the roof and walls on the interior of the shelter. Just use extreme caution when using these types of blankets around a fire because if you get it too close to the heat, the emergency blanket will melt.
Another fire option is to build what’s called a long fire. This can be setup just outside of the shelter and it should provide a bit more warmth over a traditional campfire. A long fire can be built on the ground or you can build it in a fire trench, which is simply a trench dug into the ground.
Lastly, hot rocks or a hot water bottle stuffed into your sleeping bag or positioned around your sleeping area will provide a few hours of warmth as well.
Lean To Shelter Variation
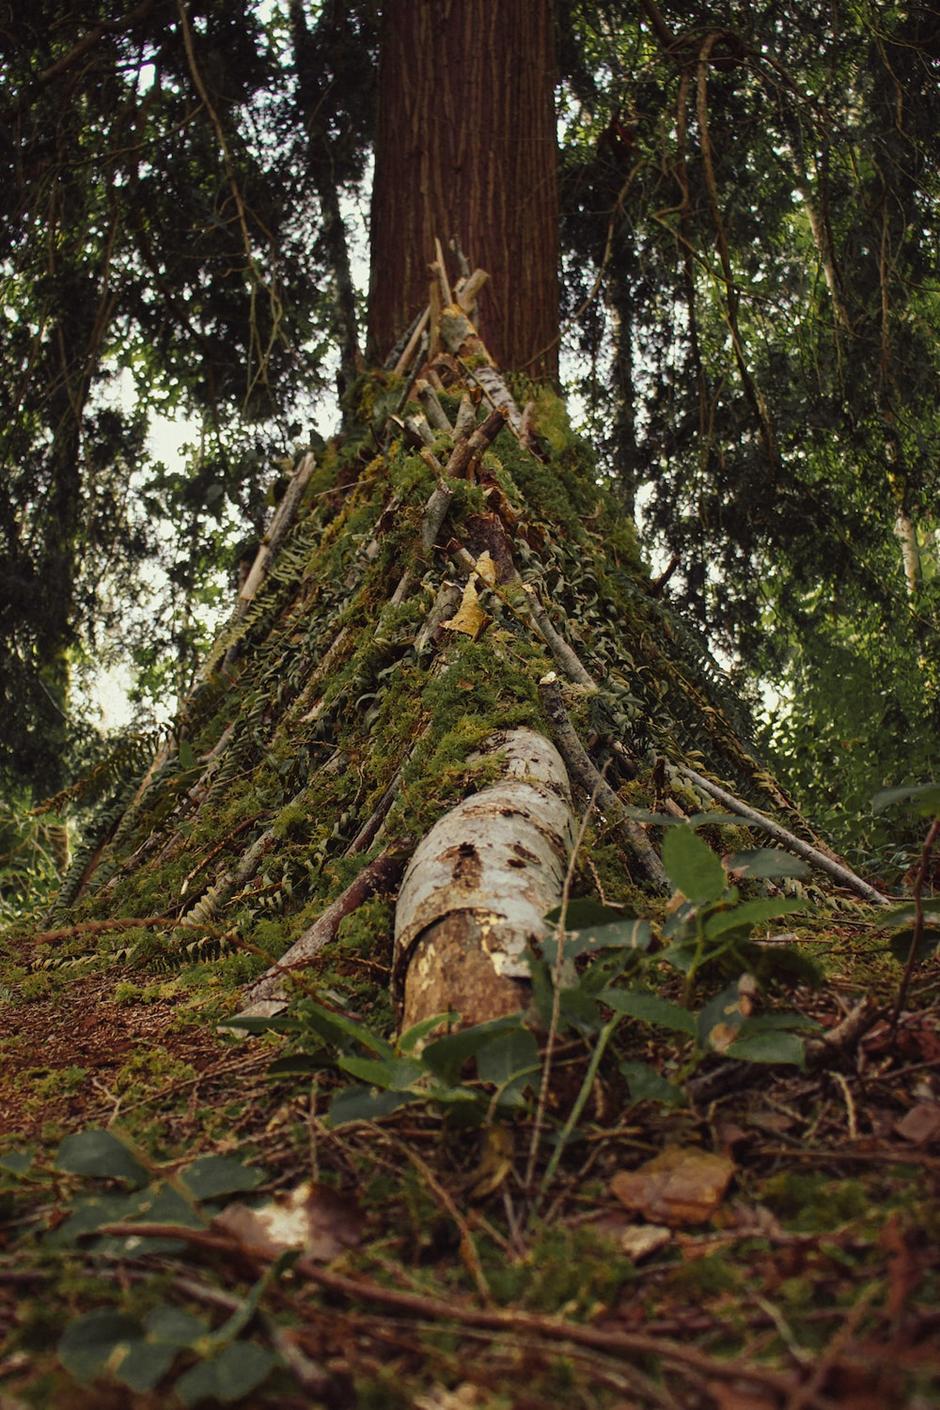
When you need to build a lean to, remember that at it’s simplest design, it’s nothing more than material leaned against another structure. By keeping this in mind, you can make the process easier by utilizing the surroundings.
For example, several large branches can be overlapped and simply leaned against a tree to make a survival shelter. To make it sturdier, take some cordage and wrap it around the tree and the top of the branches.
This same principle can be used for a fallen tree or against large rocks. By using other natural structures in the environment, you won’t have to spend so much time building a frame shelter, and they should offer more protection as well.
Pros and Cons of Lean To Shelters
Pros
- Requires minimum material
- Can be built from a variety of materials
- Easy to create
- Can be set up quickly
- Can be built in almost any location
Cons
- Won’t keep you very warm in cold regions
- Doesn’t provide protection from critters
FAQs

How long does it take to make a lean to shelter?
I’ve built a “quick and dirty” lean to shelter in under ten minutes, and I’ve also built one that took a couple of hours. It really just depends on the materials that are available, how much time you have, and what you need out of the shelter.
What is the best type of survival shelter?
The answer that everyone hates is, “the one that you have or the one that you can make.” Every type of shelter has its advantages and disadvantages and just because one works well in one situation or environment, doesn’t mean it will work well in different circumstances.
Building shelters depends on the person’s needs and circumstances at the time. Learn how to make a variety of shelters for different occasions and you will be better prepared.
Can a lean to shelter be a permanent structure?
Yes it can. There are a number of outdoor recreation areas that use a lean to shelter as resting areas for campers and hikers. Even though they may not look like your typical survival shelter, their design and purpose is pretty much the same.
Can you have a fire inside of a lean to shelter?
This primarily depends on the size of the shelter, and to some extent what the shelter is made of. Generally speaking, it’s okay to have a small fire pit within a large lean to shelter as long as it poses no danger to the walls or ceiling.
However, you must always exercise a lot of caution when using a fire pit within a shelter to avoid smoke inhalation, and damage to the shelter from heat or hot embers.
Final Thoughts
The lean to shelter may not be the “end all be all” of outdoor shelters, but if you find yourself stuck in the wilderness, this easy to build shelter will keep give you a place to sleep as well as protect you somewhat from the elements.
Thanks for reading and stay prepared!


