Mounting a new riflescope on your favorite rifle is an exciting prospect. All too often, eager shooters rush through the process and then wonder why they can’t get the riflescope and rifles to shot accurately. Mounting a riflescope to a rifle is a multistep process that you must perform in the right order. One of the major parts of mounting a riflescope is ensuring that the riflescope is level.
Mounting a riflescope requires that the scope be mounted level and plumb with the rifle, not your eye. The accuracy of your riflescope depends on the windage, and elevation adjustments accurately aligned with the rifle’s bore. Correct alignment ensures that the reticle position is correct and that the scope aligns with the rifle’s bore.
There are several methods of aligning a riflescope with the rifle to ensure it is level and plumb. Some methods depend on special tools, while others use a spirit or line level. We will look at different methods of leveling a riflescope in this article.
Why Level a Riflescope?
Leveling a riflescope during mounting is much different than leveling the scope and rifle when aiming or firing. During mounting, the goal is to place the rifle in the mounts and align the reticles with the rifle’s action.
Leveling a riflescope during mounting ensures that when you are ready to zero the scope and rifle, all the adjustments work in the proper way to give you the most accurate aim possible. Leveling your rifle scope is important for several reasons.
- A riflescope that is level with the rifle ensures that the windage and elevation adjustments happen in the proper plane with the rifles. In other words, the windage adjustments will track horizontally at right angles to the vertical orientation of the rifle’s action. Elevation adjustments will track up and down in line with the vertical orientation of the rifle’s action.
- When the riflescope is level with the rifle, the reticle should perfectly align with the rifle’s action. You should not see any cant in the reticle when looking through the scope.
- When everything is properly aligned, the rifle and riflescope function as a single unit. Adjustments to windage and elevation are true and accurate. Your reticle will appear clear and upright in line with your rifle
If you try to zero a riflescope that is not level with your rifle, you will probably experience problems that often lead to frustration. This frustration often is directed at the scope. In many instances, the inability to zero a scope and rifle can be tied directly to an unlevel scope or other mounting problems.
How to Level a Riflescope: Three Easy Methods that Work
There are three proven methods that I have used to level riflescopes successfully. Two of these methods require a bit of specialized equipment. Whichever method you chose, it is important to work carefully to ensure that your alignments are precise.
Using a Bubble Level to Level your Scope
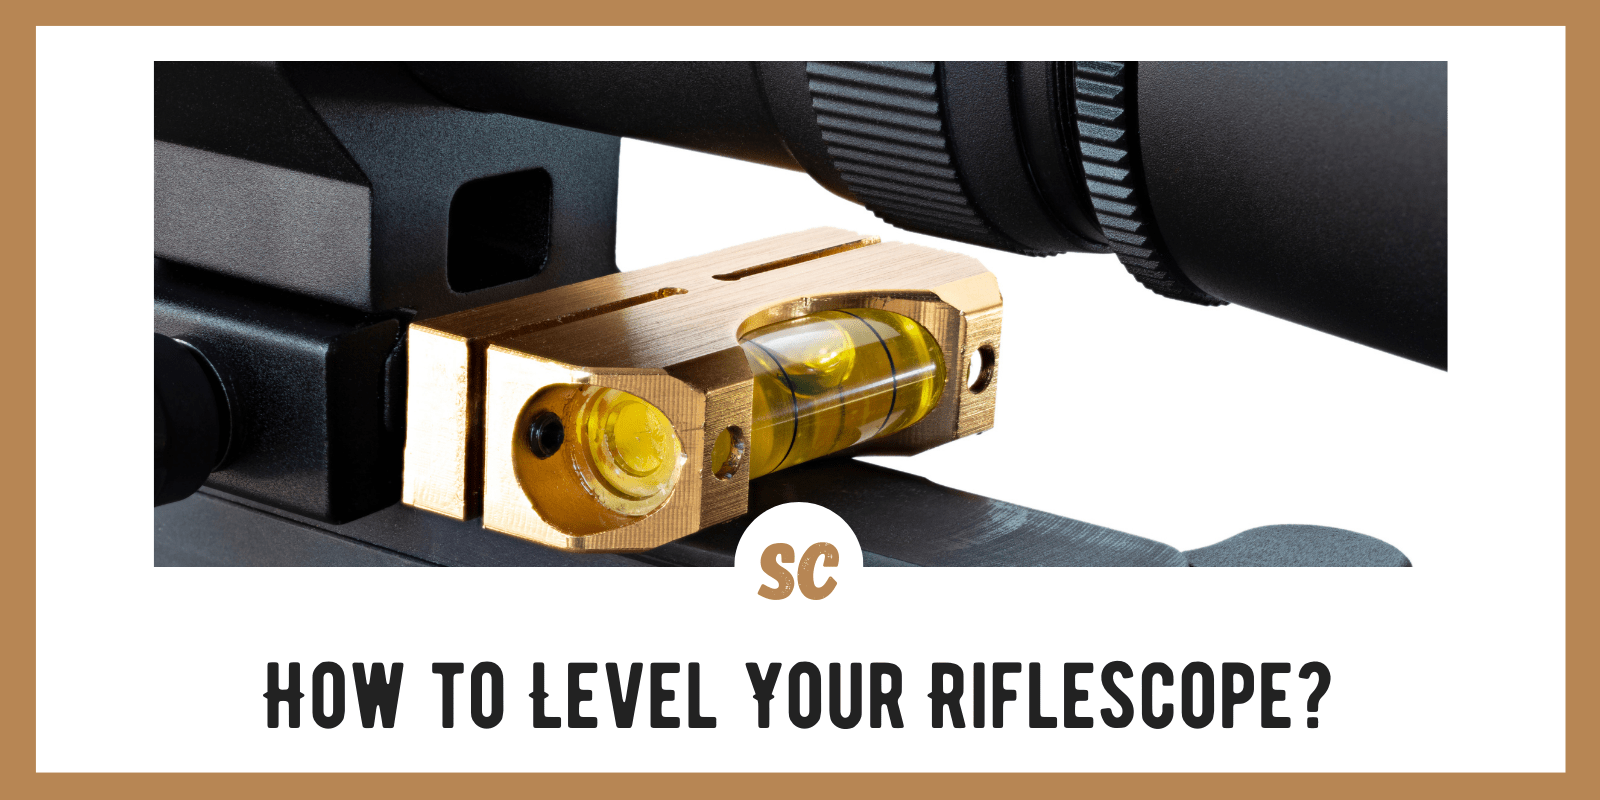
It is possible to level your rifle scope with nothing more than a simple bubble level. I have used a 6-inch bubble level and a line level. A line level works better because it is smaller and easier to manipulate on the rifle.
If you choose to use a line level to adjust your riflescope, having two small line levels is more convenient and can save you time. However, you can do the job successfully with only one line level.
These are the steps I use to level a riflescope using a simple bubble line level.
Step 1: Level and Secure Your Rifle.
Before you do anything else, check your rifle and make sure it is in a safe condition. Remove the magazine. Check the action and the chamber. If possible, remove the bolt. Do everything you can to ensure that the rifle is in a safe condition.
When mounting a scope, it is always best to use a rifle vise or sandbags to hold our rifle in a stable position. Eliminating the rifle’s movement as you install the scope mounts, rings, and scope is important.
Before starting on the riflescope mounting, the rifle must be level. Use the line level on a flat surface on the rifle’s action to ensure that the rifle is level. It may not be easy to find a flat spot on some rifles. You may have to use your ingenuity to get a flat-level reading.
Once the rifle is level, you can start mounting and leveling your new riflescope.
Step 2: Install the Bases and Lower Ring Halves
Before mounting the bases and lower ring halves, be sure you are familiar with the manufacturer’s recommendations. The proper torque for the screws is extremely important. If you don’t have a torque driver, you should stop until you can buy or borrow one. Too much torque can warp the mounts or strip the threads on the screws. Too little torque may allow the screws to vibrate loose.
Step 3: Recheck that the Rifle Is Level and Install the Scope and Upper Rings
Take a moment to recheck that the rifle is still level in the vise or sandbags. Once you are sure that the rifle is level and ready, you can begin to install the scope.
Place the scope on the lower half of the rings. Don’t forget to check the eye relief on your scope. Having to remove the rings to adjust the eye relief later can undo all your leveling work.
Place the top ring halves on the mounts when you are happy with the eye relief. Tighten the screws on the rings enough to hold the riflescope snuggly but still allow you to adjust the riflescope.
Step 4: Level the Riflescope
Use your line level to level the scope from left to right on your rifle. Most riflescopes have caps on the turrets. The elevation turret on top provides a flat spot to place your line level. Place the line level on the turret cap at right angles to the bore of your rifle and check the level. Carefully adjust the scope in the rings until the scope is level.
Now align the level with the bore of your rifle and check your riflescope level from end to end. If you find that the rifle action is level, but your scope is not level, you should stop and make sure you install the bases and rings properly. There is a chance that your ring set has a front and back ring. If you reverse the rings, your scope may be high or low in the front.
Step 5: Torque the Ring Screws
When you are satisfied that the rifle and the riflescope are level, torque the ring screws to the manufacturer’s specifications. Applying the right amount of torque to the screws is critical to ensure that the rings apply the right force to the scope tube. Too much torque can damage the scope. Too little torque and the scope may move in the rings.
Last update on 2021-10-01 at 09:33 / Affiliate links / Images from Amazon Product Advertising API
The Segway Reticle Leveler
A relatively cheap tool for leveling riflescopes is the Segway Reticle Leveler. This tool is quick and easy to use and can align a scope with a rifle in just a few steps. The Segway Reticle Leveler comes with complete instructions that are almost foolproof. In short, these are the basic steps to using the Segway Reticle Leveler.
Step 1: Make the Rifle Safe and Secure It
Always make sure your rifle is in s safe state before doing anything else. Remove the magazine and check the action and the chamber. Remove the bolt on bolt action rifles. Use a gun vise or cradle to hold the gun securely. Level the rifle using a line level.
Step 2: Install the Rifle Scope and Mounts
Install the scope mount bases and the lower half of the rings. Follow the manufacture’s recommendations when torquing the screws on the bases. Place the scope in the lower half of the rings and install the top half rings. Tighten the screws enough to hold the scope snugly but still allow adjusting the scope.
Step 3: Place the Segway Reticle leveler on the Rifle
Follow the detailed instructions and place the brass bar of the Segway Reticle Leveler on the base of the scope mount under the riflescope. Attach the two plastic wings with the supplied rubber band.
Step 4: Use the Bubble Level on the Segway to Ensure the Rifle is Level
Adjust the rifle so that the bubble level on the Segway is centered. Look through the scope and ensure that the reticle aligns with the horizontal lines on the Segway plastic wings.
Step 5: Secure your Riflescope
When you are satisfied that the reticle and the lines on the Segway wings align, you can begin to tighten the screws on the rings of your scope mount. Follow the manufacturer’s instructions and use the correct torque and pattern to tighten the screws.
Last update on 2021-10-01 at 09:33 / Affiliate links / Images from Amazon Product Advertising API
The Wheeler Professional Reticle Leveling System
If you are serious about getting the best performance from your rifle and riflescope, you may want to invest in what I consider the best reticle leveling system on the market. Wheeler Engineering produces a wide variety of gunsmithing tools. Having the right tool is the key to doing a professional job.
The Wheeler Reticle Leveling system gives you the tools to make leveling a riflescope a precise job. Each kit comes with all the necessary tools and a set of detailed instructions that will give you professional results from the start. The basic steps to use the Wheeler Reticle Leveling system give an idea of how this system works.
Step 1: Make Things Safe and Secure your Rifle
Put your rifle in a safe condition. Make sure the rifle is unloaded, and the magazine is removed. Clear the action and check the chamber. If your rifle is a bolt action, remove the bolt. Secure your rifle in a cradle or a vice.
Step 2: Level your Rifle in the Vice or Cradle
Use the reference level in the Wheeler kit to ensure that the rifle is level both vertically and horizontally. Place the reference level on a flat surface on the rifle. On some rifles finding a flat surface may be a challenge. If your rifle has a bottom trap door magazine, the trapdoor may be an option.
Step 3: Attach the Barrel Level
Place the barrel level on the rifle and tighten with the reference level attached to the rifle. Match the level reading of the barrel level and the reference level. When you are satisfied that they are the same, finish tightening the barrel level to ensure it doesn’t move.
Step 4: Install the Rifle Scope
Place your riflescope into the lower half of the scope rings and place the upper halves in position. Insert the scope ring screws and tighten them. The screws should hold the riflescope snuggly but still allow you to move the scope.
Step 5: Place the reference Level on the Top Turret
Place the reference level on the top turret cap at a ninety-degree angle to the scope tube. Carefully rotate the scope in the rings until the reference level is centered. Make sure the barrel level is still centered as well.
When both levels read the same, carefully tighten the scope rings screws. Follow the manufacturer’s directions and use a torque wrench to ensure that you use the proper torque.
Last update on 2021-10-01 at 09:33 / Affiliate links / Images from Amazon Product Advertising API
Getting the Most from Your Riflescope and Rifle
We all want the best shooting and accurate rifle and riflescope combination possible. Of course, getting the most of your rifle and riflescope has a lot of components. Choosing the right rifle and riflescope is critical. Almost as critical is the care that you take when you mount your riflescope to your rifle.
A sloppy scope installation will result in a sloppy and inaccurate rifle. Part of accurately mounting a riflescope is ensuring that your riflescope is level with your rifle and the reticle is in the correct position. Accuracy begins with the care you take when you install your riflescope.


