People have been using camouflage and “disappearing” into nature for, well, probably as long as we have been around. Camouflage is used as a type of concealment for hunting purposes, to hide from an external threat, and in more recent times, by soldiers during war.
It wasn’t until the last hundred years or so that soldiers, especially snipers, began using what we call a ghillie suit to camouflage themselves on and around the battlefield. Before that, the ghillie suit appears to have originated as a portable hunting blind. Pretty ingenious if you ask me.
Of course, nowadays, the ghillie suit has become the trademark symbol of the modern sniper, even though some people will use them for hunting or in the recreational sports of airsoft and paintball.
To get your own ghillie suit, you basically have two options: either buy one or make your own.
Generally speaking, buying one is far cheaper than the process of making basic ghillie suits, unless of course you already have the available materials. For reasons I will explain later on in the article, I am choosing to make a ghillie suit. This article is all about sharing that process with you from beginning to end.
I’ll be discussing:
- What a ghillie suit is
- Their disadvantages
- My experience with them
- How to make one
- And FAQs
What is a Ghillie Suit?
Basic ghillie suits are made of material that a person wears so that they can more effectively camouflage themselves or blend into specific environments.
It usually consists of two or three main pieces: a camouflaged base layer with a top (shirt) and a bottom (pants), a hat, and the outer layer. The outer layer is mesh netting that is attached to the base layer and the mesh netting is used as an anchor point to attach various materials that will help camouflage a person.
When it comes to camouflaging yourself in any environment there are a few key things you want to add or eliminate from your presence so that you will blend into the natural landscape:
- In most natural environments, you want to eliminate shine. This means nothing on your person should be glossy or shiny because this attracts unwanted attention quickly.
- Your shape and silhouette also need to be masked. When a person stands on top of a hill, the human silhouette is clearly defined. Believe it or not, that silhouette and the shape of the human body is still easily seen even when wearing camouflaged clothing.
- The colors that you wear will of course determine how much a person stands out in a given environment. Wearing hot pink in the woods will make you stand out more than wearing natural colors that blend into the environment. So, we must take into account contrast, shadows, shape, silhouette, colors, and shine.
Disadvantages of a Ghillie Suit
The main advantage of a good ghillie suit is that it camouflages a person much better than camouflage clothing alone. I say a good ghillie suit because a badly made one will make you stick out just as much as not wearing one at all.
However, even good ghillie suits have some major disadvantages that don’t get discussed much, but they are certainly worth brining up:
Weight
Ghillie suits can be as big or as small as you like. But depending on the type and amount of material it has, one of these suits are going to add – at a minimum – several pounds of extra material to carry around.
Temperature Regulation
The purpose of a ghillie suit is to provide concealment and not insulation or air flow. In warmer climates these suits will make you hotter, and when things start to cool down, you will get cold, especially if you are laying directly on the ground.
Mobility
Again, most ghillie suites are made for concealment and not mobility. There are a variety of different kinds of ghillie suits, but generally speaking they are not conducive for running or quickly overcoming obstacles.
Fire Safety
One aspect of a ghillie suit that most people never even think about is that when you are wearing one of these, you are basically a giant fire hazard. After all, they are stuffed with natural fibers and biomass (leaves, grass, twigs), so they are quite flammable.
Someone in a combat zone will be more effected by this, seeing that there is a higher probably of being exposed to sparks and fire. However, even if you are not in a combat zone, you should consider spraying a ghillie suit with some kind of fire retardant.
Since they are a fire hazard, you should also consider a safe place to store the suit when it is not in use.
My Experience
I’m going to say something that you probably won’t hear on any other tutorial about ghillie suits:
I have never made one, nor have I ever worn one.
However, I do have a lot of experience with camouflage because I have spent over half my life outdoors hunting. My base layers have always been your typical hunting camo patterns, and when I was younger, I experimented a lot with applying mud, and localized vegetation to my base layer and headwear.
Sometimes it looked great…and other times I looked like a human blob that the woods spit out.
One time in particular my camouflage worked very well. I was crawling along a creek bed when I saw a female white tail deer making its way towards me. I wasn’t hunting deer at the time, but I wanted to see how close I could get before she spotted me.
I stopped moving and waited for her to make her way along the bank. After about thirty minutes she was within ten feet of me, and I swear I could have reached out and touched her. I could barely contain my excitement because I had never been that close to a deer in the wild under those circumstances.
After a few seconds, her head flipped up and her ears perked back. She looked in my direction, not at me exactly, but in my direction. She then promptly turned tail and sprinted away. I don’t believe she saw me, but I am pretty sure she smelled me.
Over the years, I have meant to make a proper ghillie suit but some excuse always prevented me from doing so. At one point, I came very close to just buying one, but store-bought ghillie suits just don’t look right to me, and I’m a huge DIYer. I love DIY projects because you obtain new knowledge, skills, and there is a huge feeling of satisfaction when you have successfully finished.
How to Make a Ghillie Suit
As I mentioned in the previous section, I’ve never made a ghillie suit, but over the years I have read up on them and watched countless shows and videos explaining them.
Within the last year I came across a video on YouTube made by the Gray Bearded Green Beret in which he describes how he makes a ghillie suit. He brought up a ton of practical points and materials to use for this project that I really liked.
So, I’ve got to give credit where credit is due. While some of the materials and methods listed below may be a little different than his, the way I am going about making my ghillie is largely based on the advice provided by the Gray Bearded Green Beret. Before getting started I want to thank him, because that video encouraged me to finally kick myself in the butt and get this project started!
What You Will Need
In the picture above is everything I used to make the ghillie suit in one great big pile. It’s kind of hard to see everything, so I listed all the materials and tools I used to make a ghillie suit in more detail below.
Depending on the environment you will be wearing the suit in, some materials and color choices may need to be changed.
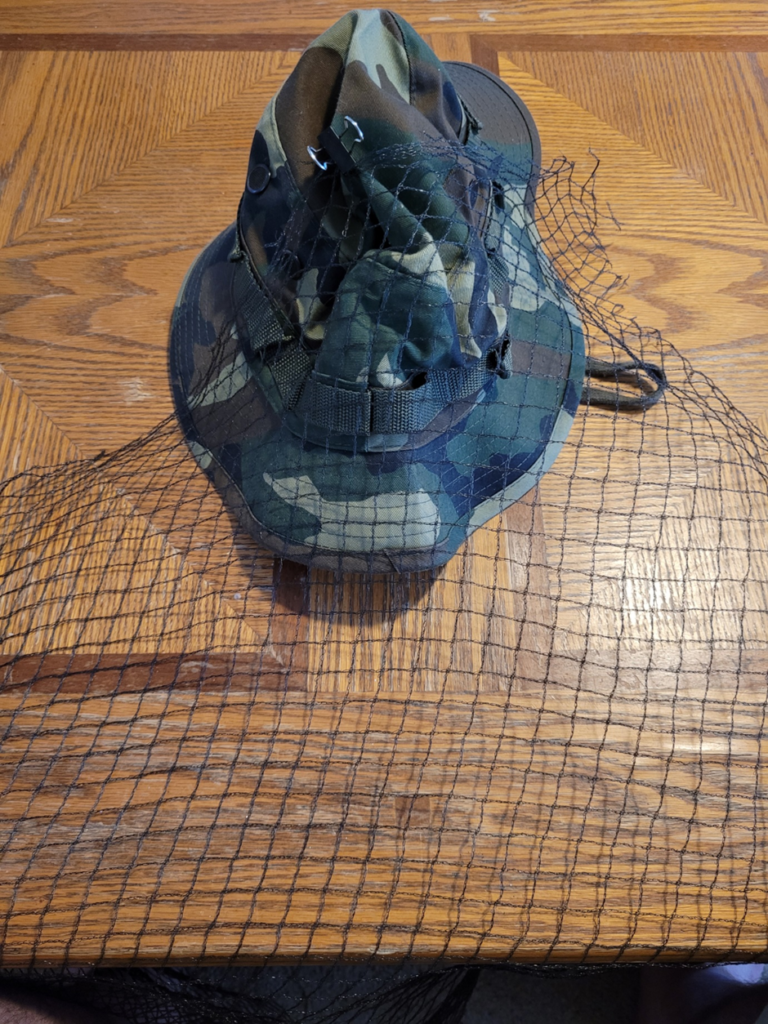
Boonie Cap
A boonie hat is one of those floppy looking hats that you typically see an “old” guy wearing (yeah I wear one). They have a brim that goes all the way around the hat to provide protection from the sun, but this also helps to provide additional camouflage coverage.
Sometimes these hats come with loops sewn in around the top and sometimes they don’t. I decided to get one that had loops because I figured the loops would give me more anchor points for mesh netting and an easy attachment point for vegetation. The hat will also make it much easier to make a ghillie hood.
Camo suit
My camo suit is underneath the boonie hat in the image above. It is a BDU (battle dress uniform) that I got from a surplus store. The top and the bottom as well as my hat are woodland camo.
You are going to want the shirt to have long sleeves. This will not only give you better camouflaged coverage, but it will help to protect your skin and to avoid plants like poison sumac and poison ivy from getting onto you.
The long sleeve shirt (top) is slightly different in color than the pants (bottom) because I had to purchase them individually, but they are close enough and I figure the difference will just help to break up the pattern.
The suit is the base of the ghillie suit and is what everything else will be attached to. One thing to keep in mind is that you want the shirt and the pants to be at least one size larger than your normal clothing.
This is so that you have extra room to wear insulating layers underneath (or normal clothing) underneath it. If you have absolutely no intention of needing the extra room then go ahead and size them to fit.
Other options that you could use for the base are regular camouflaged hunting clothes. I have also heard of people using military flight suits, although I am not sure how well those would work.
No matter what you choose for the base of the suit make sure the material is rugged. Cheaper suits and materials won’t hold up to being dragged around in the outdoors.
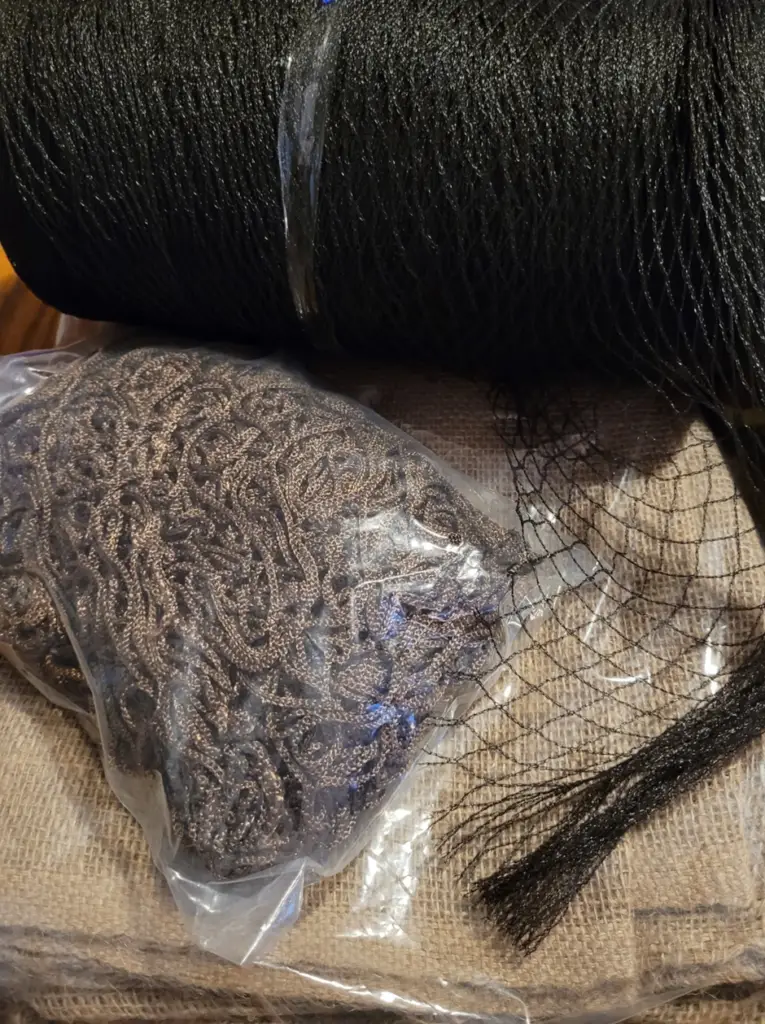
netting
You’re going to need some type of netting that will be sewn into the suit. I didn’t want the diamonds, or the holes in the net, to be too small or too large because this is where I will be tying camouflage material in later on.
Also, if you plan on actually using the suit quite a bit and in rugged terrain, you are going to want netting that is heavy duty. I couldn’t find the netting that I wanted, so I opted for a combination of two different kinds.
The first is basic garden netting that was labeled as “heavy duty,” and the second is Arcturus Ghillie Suit Netting Material, and it is marketed as netting specifically for ghillie suits. I’ll talk a bit more about that later on. Replacement fishing net would also work.
Lastly, try to get your hands on some netting that isn’t shiny. If you can’t, its not a huge deal as long as you make sure to cover shiny spots later on with some spray paint.
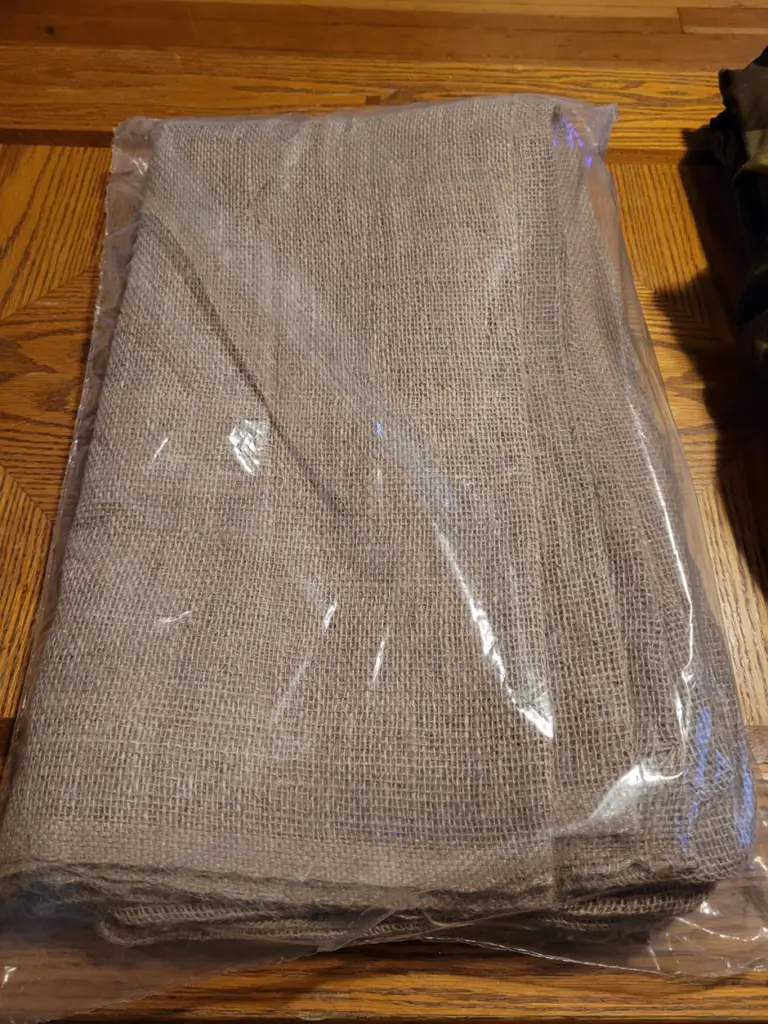
Burlap Bag
A burlap bag and some jute twine are a great combination for the base of camouflage that will help to look like natural vegetation. The billowy material will also help to mask the human silhouette. I picked up a set of four bags which should be more than enough…
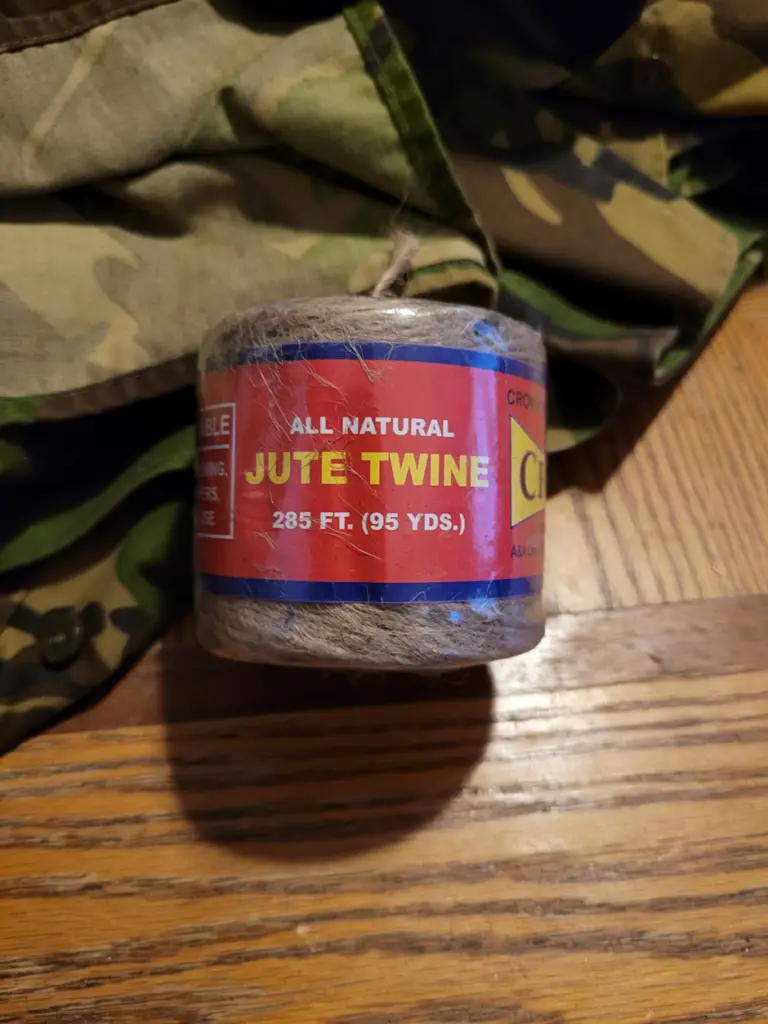
Jute strands or braided jute twine
I wasn’t exactly sure how much jute I was going to be needing so I picked up two rolls, 285 ft. each, of all natural jute twine. Hopefully that should be enough…
Fabric dye
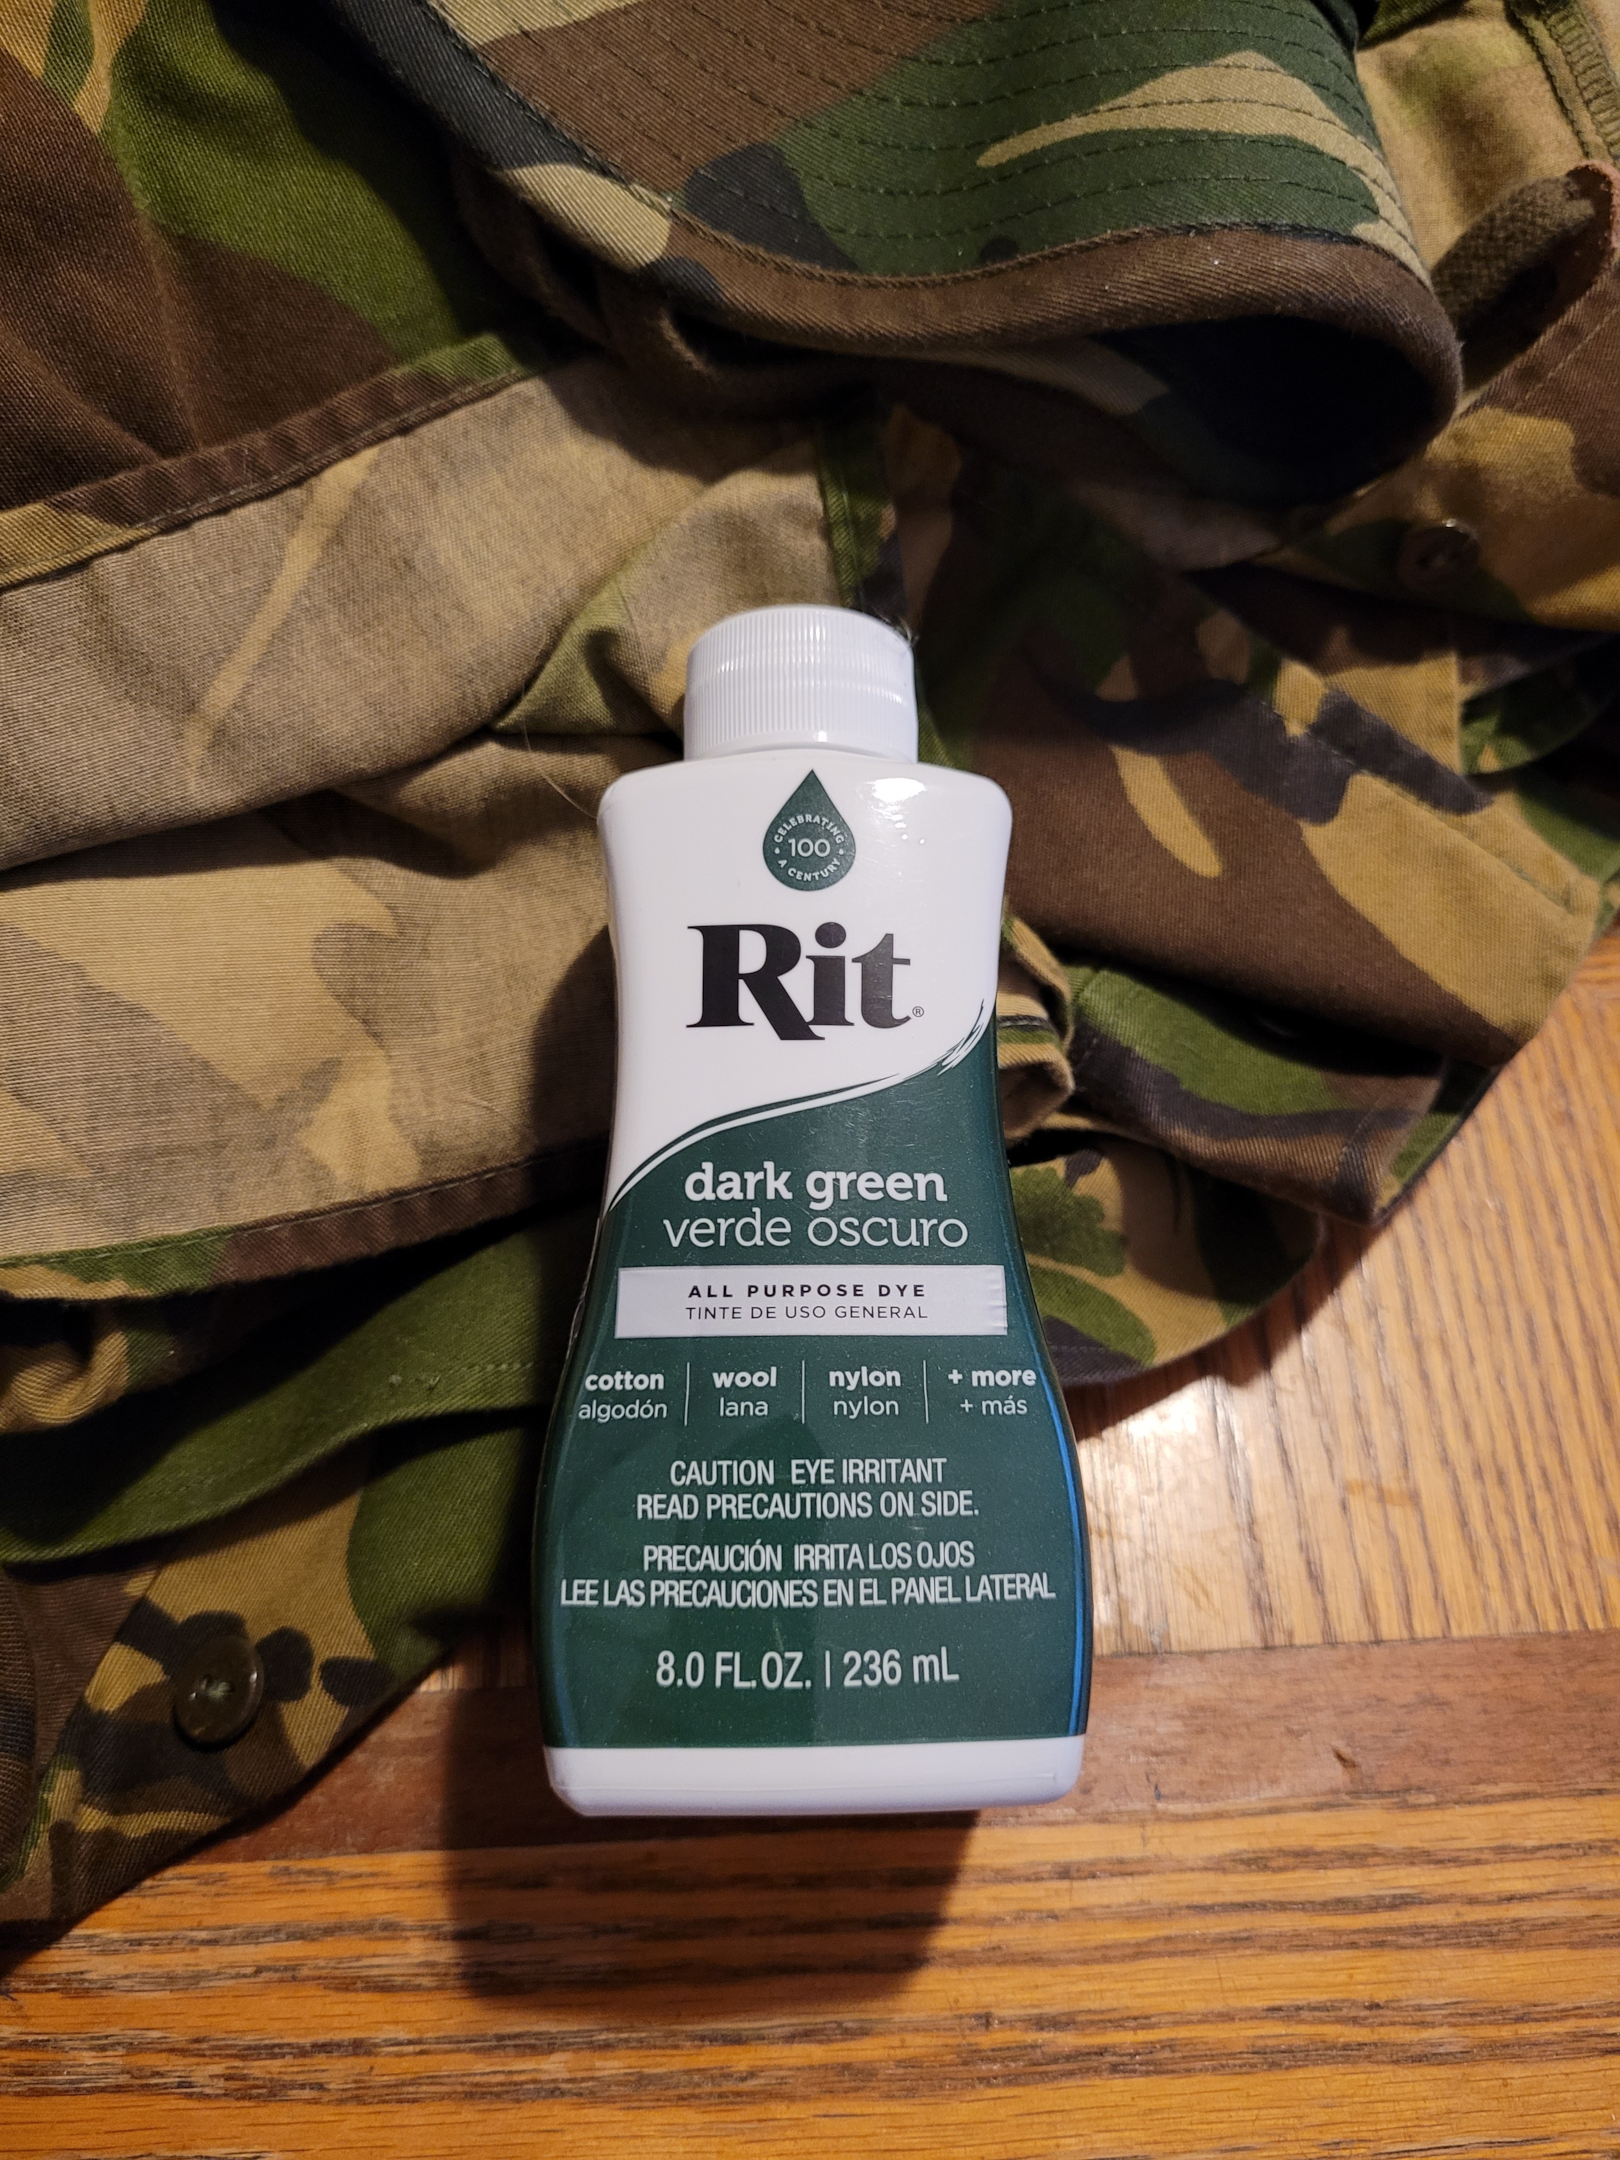
I’ll be using the fabric dye to add some color to the burlap material and jute material. Since the ghillie suit base is a woodland design, I went with a dark green. I figured I only needed one dye because when I combine undyed material with the dyed material, I will have two different colors to work with; dark green and brown/tan.
Going with such a dark color and only getting one color type might have been a mistake, but we will find out together at the end of the build!
Joint pads
This item was something that I never even thought about until I heard it from the Gray Bearded Green Beret. If you plan on being on the ground and crawling, you are going to want some padding around the joints of the suit and insulation from the ground.
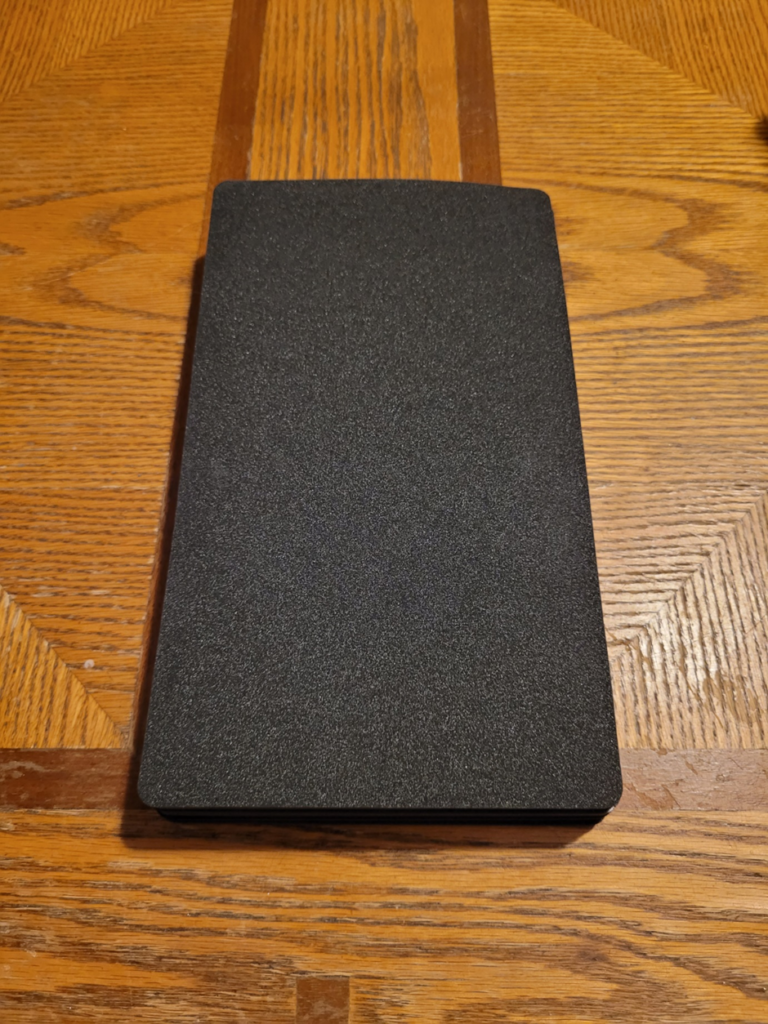
The Gray Bearded Green Beret recommended using knee pads for their intended use and to find a closed foam sleeping mat that could be sew into the interior front of the jacket. I couldn’t find a mat that I wanted, so I just picked up a bunch of these closed cell foam knee pads from a surplus store. You’ll see how I incorporated them later when I show you how I made my own ghillie suit.
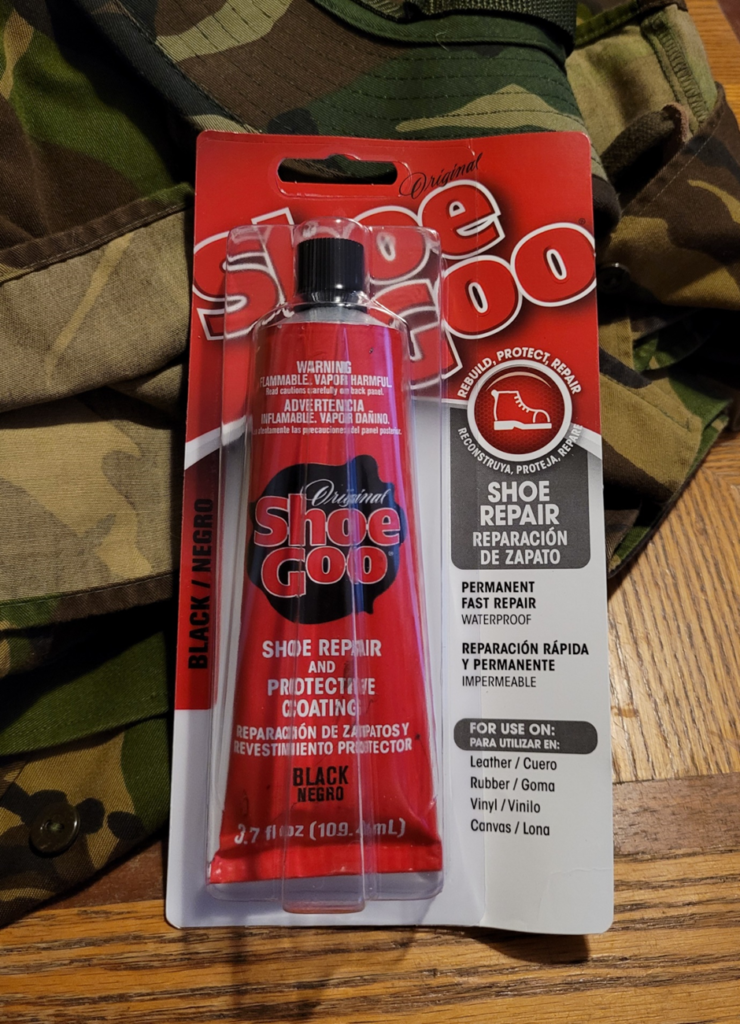
Shoe glue (shoe goo)
You are going to need some adhesives for putting the ghillie suit together. The two that were recommended were Shoe Goo, which is a type of shoe glue, and some Krazy glue.
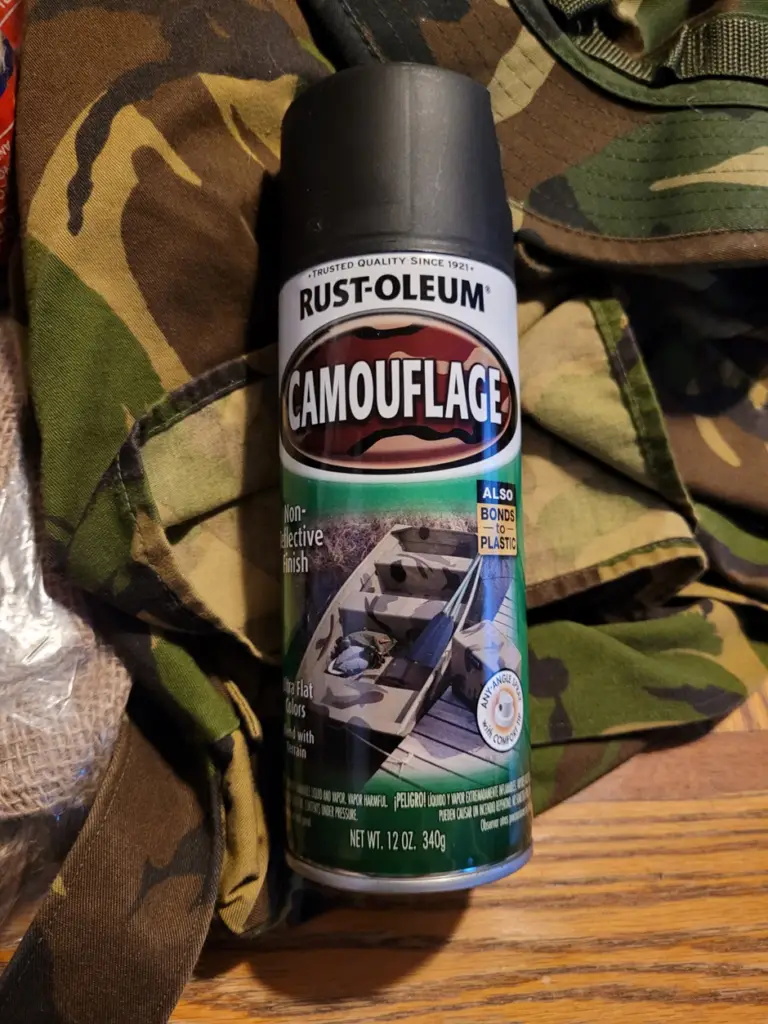
Flat spray paint
A can of spray paint is going to make quick and easy work of getting rid of any shiny material and to help the suit blend in with the surrounding environment. Stick with colors that will blend into the natural vegetation, like black, tan, brown, and green.
Remember, the point of the spray is to add some color coverage, but to also help reduce shine. So, make sure it that the paint has a flat or matte finish.
Military duffel bag
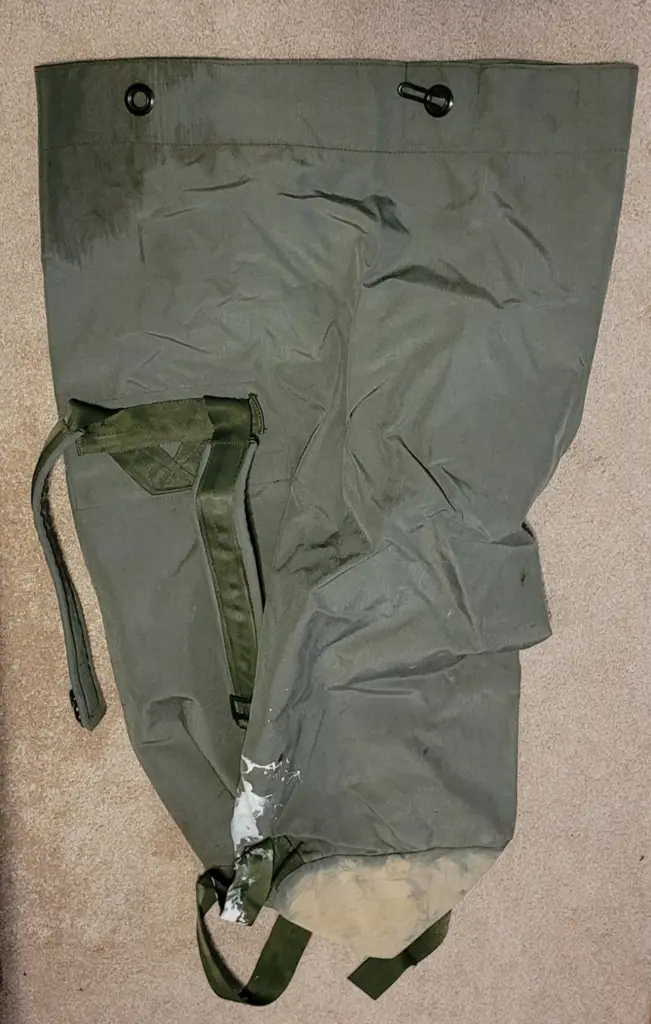
This is a military duffel bag that I got used from a surplus store. I will be taking it apart so that I can use the heavy-duty canvas to reinforce certain areas of the ghillie suit, which is why I didn’t care it was used or had some white paint on it.
If you have access to some other type of heavy duty canvas, that can be used as well.
Heavy duty thread
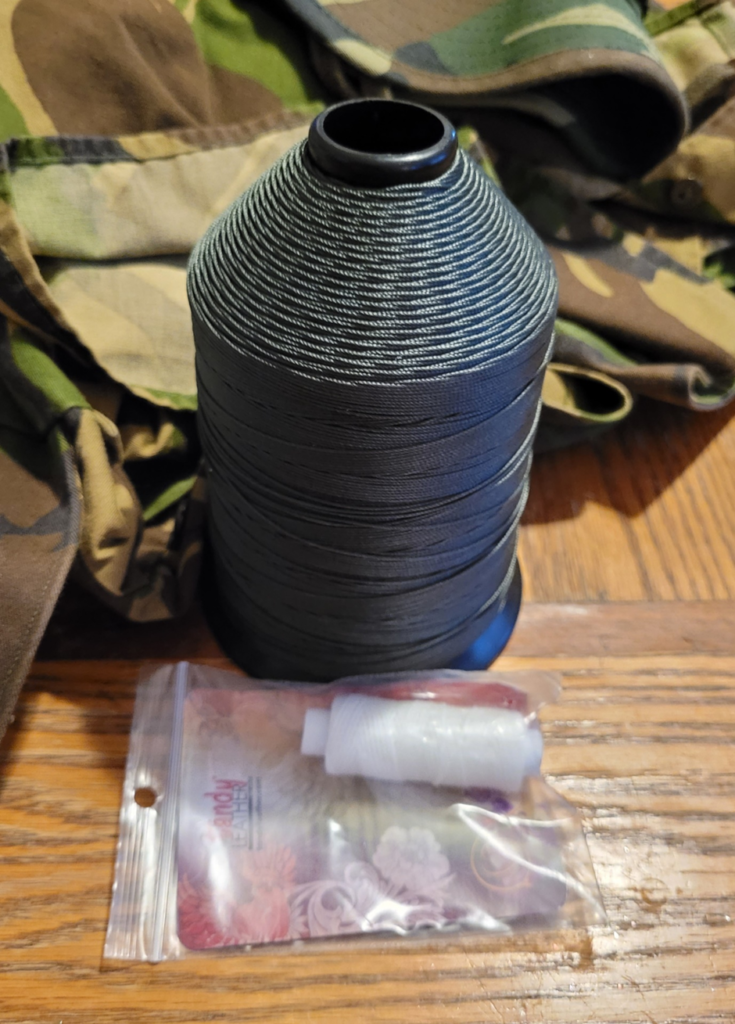
Everything about a ghillie suit needs to be heavy duty if you expect it to hold up to crawling through rough terrain, so even the thread needs to be heavy duty. I picked up a spool of heavy duty nylon thread from the surplus store and a few rolls of waxed thread from Tandy Leather.
Canvas needle or a Speedy Stitcher
I will be making my DIY ghillie suit by hand sewing. Since I am using some pretty heavy-duty materials, I need some heavy-duty needles, like upholstery or canvas needles.
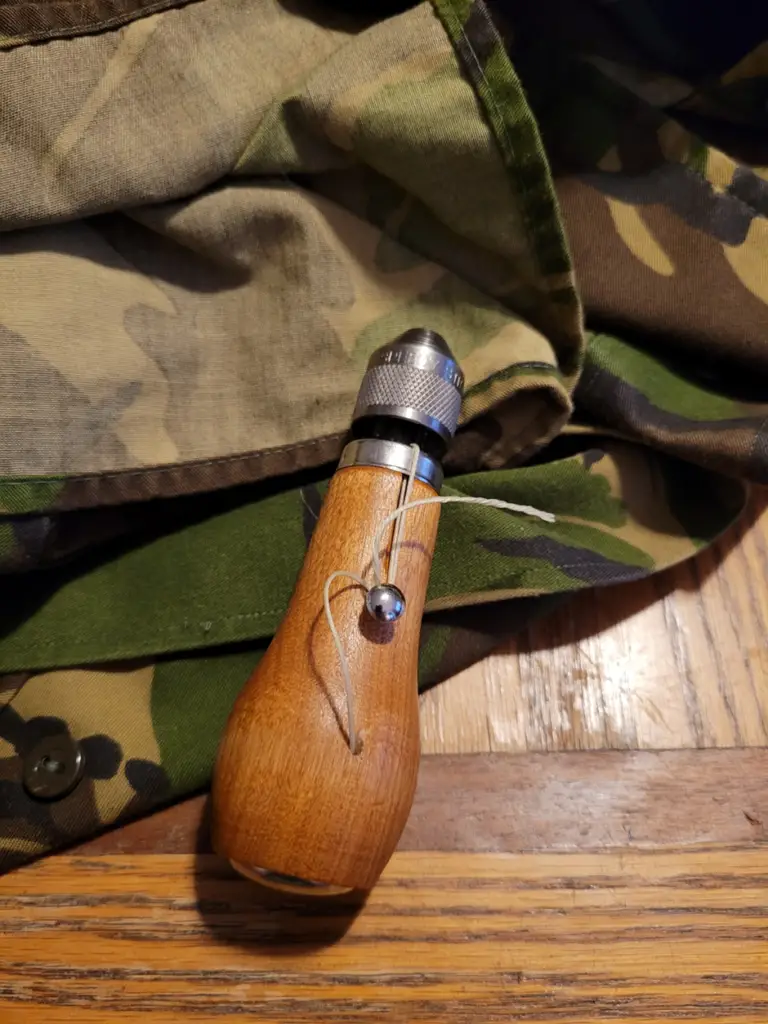
Additionally, I figured there was no way I would even attempt such a project without the Speedy Stitching Sewing Awl. And while its not required, I do recommend you get one. Not only for this project, but it is a great tool to have for patching gear in the field.
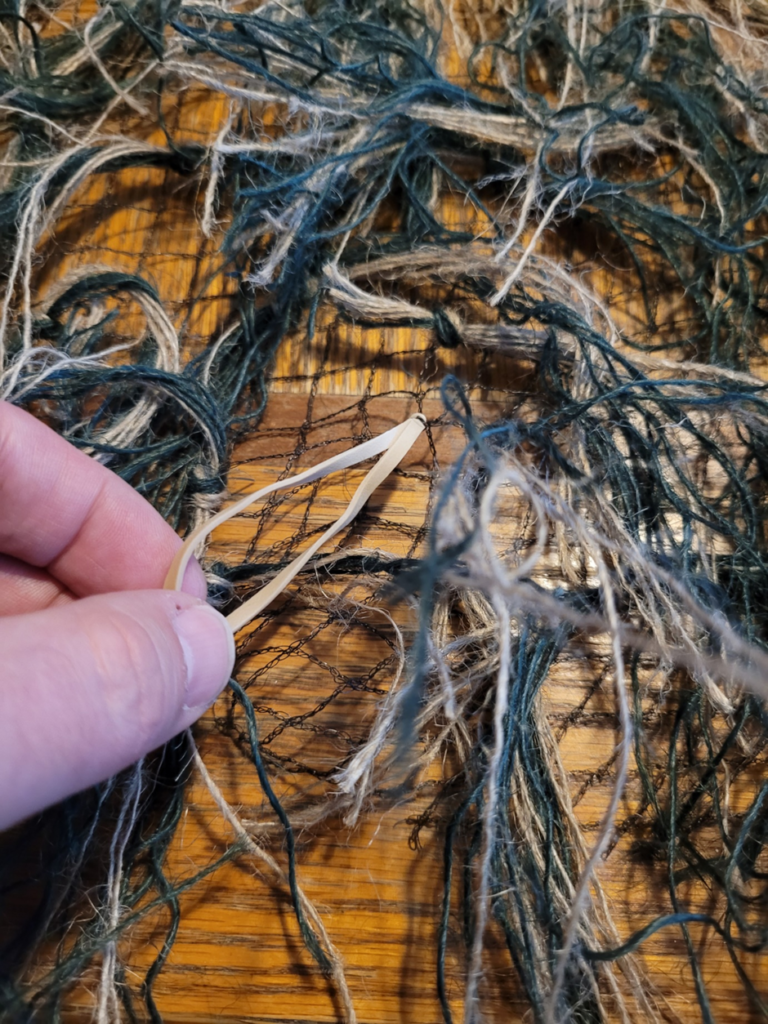
Rubber bands
This was another one of those odd items that didn’t even occur to me (thanks Gray Bearded Green Beret!). You are going to want a healthy supply of rubber bands as they provide a quick and easy way for attaching natural vegetation in the field.
DIY Ghillie Suit
Now it’s time to DIY a ghillie suit! I’m going to break this process down into a series of steps. I’ll try my best to be brief in the description, but I think you will appreciate it more if I give some detail of the process rather than just say “add the padding” or “attach the jute.”
Also, unless I say otherwise, I generally only use either a running stitch or a back stich when I sew.
Step 1: Remove Identifiers
Since I got the camouflage shirt and pants from a surplus store, there were some identifiers sewn into them, like flags and patches. I removed those and sewed up the edges. It’s up to you whether or not you want to leave such patches on, but they will probably need to be covered up.
Step 2: Relocate Pockets
There were two pockets on the front of my shirt that were going to end up being covered by padding and canvas. One of the suggestions was to cut them out and resew them somewhere else on the suit where they could still be used, so I decided to do that.
This step is optional, but pockets are useful things to have so I didn’t want them to go to waste.
Step 3: Re-sew Pockets
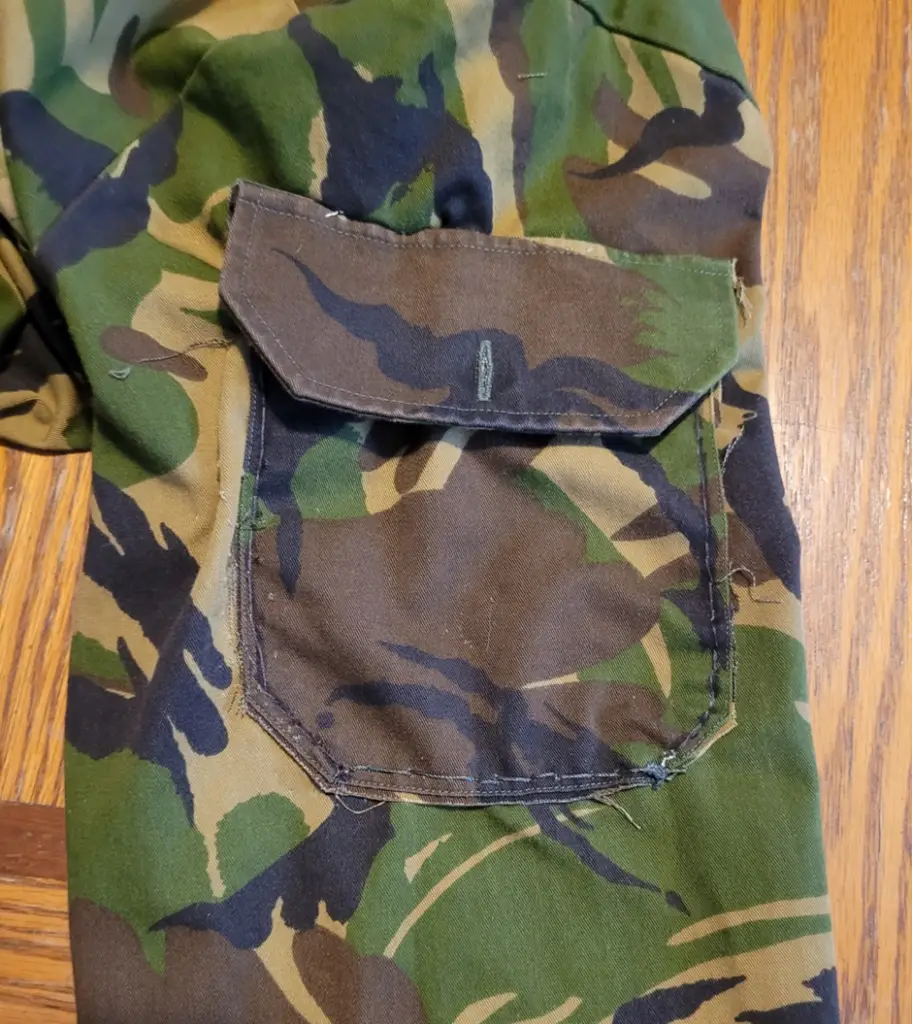
After removing the pockets, I resewed them onto the shirt sleeves so that they could be easily accessible without having to move too much. I used an upholstery needle and some white thread (because I couldn’t find my black thread) to reattach the pockets. I then used a Sharpie marker to quickly cover the white thread, so it didn’t stand out.
I have heard some people use dental floss for sewing thread due to its strength or even fishing line. It is pretty strong stuff but if you use it, just be sure to cover it with spray paint or use a Sharpie marker to cover up the shine.
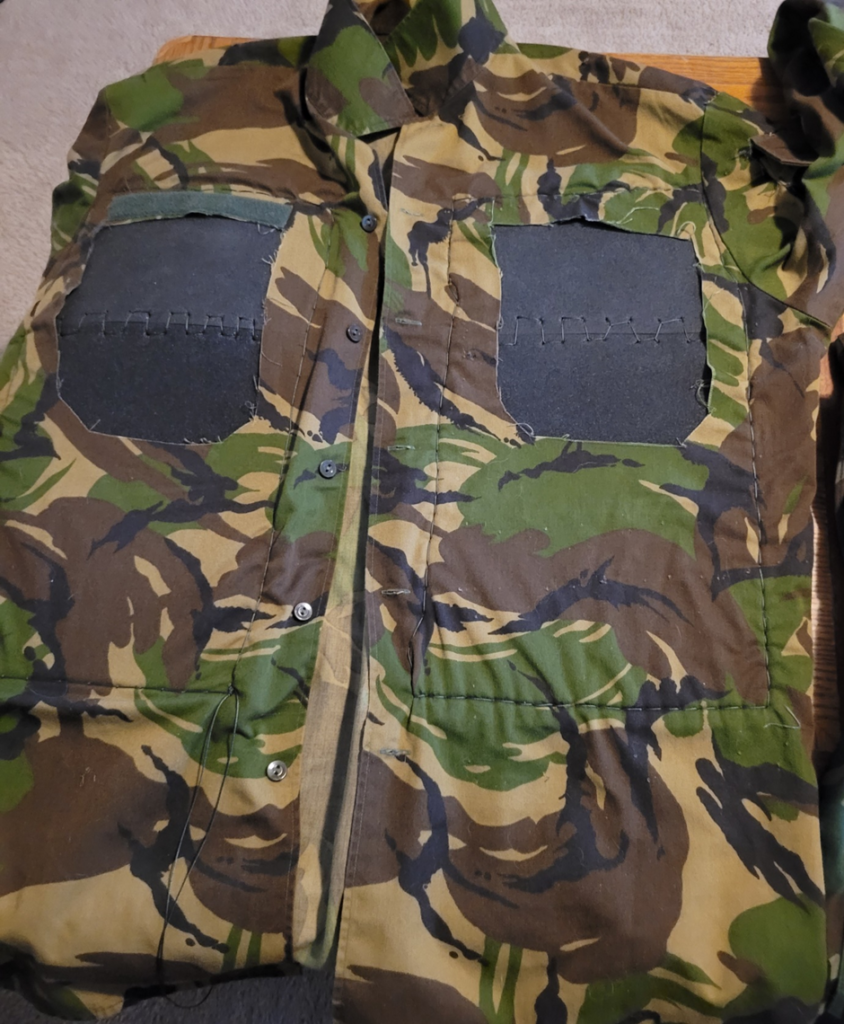
Step 4: Add Padding
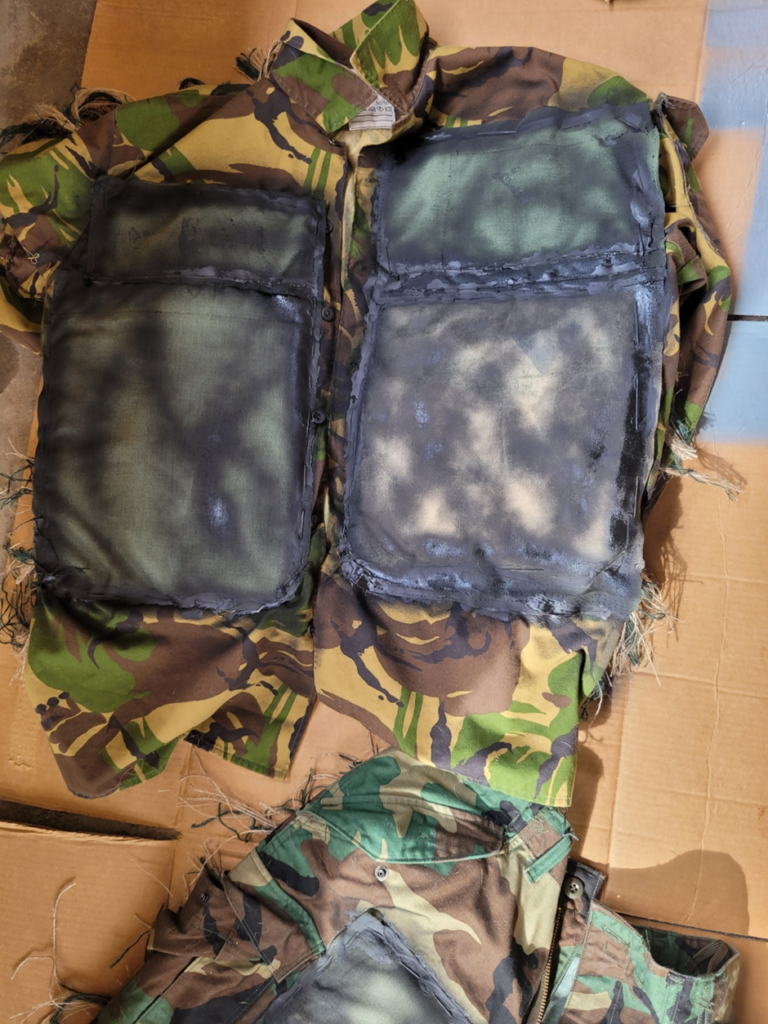
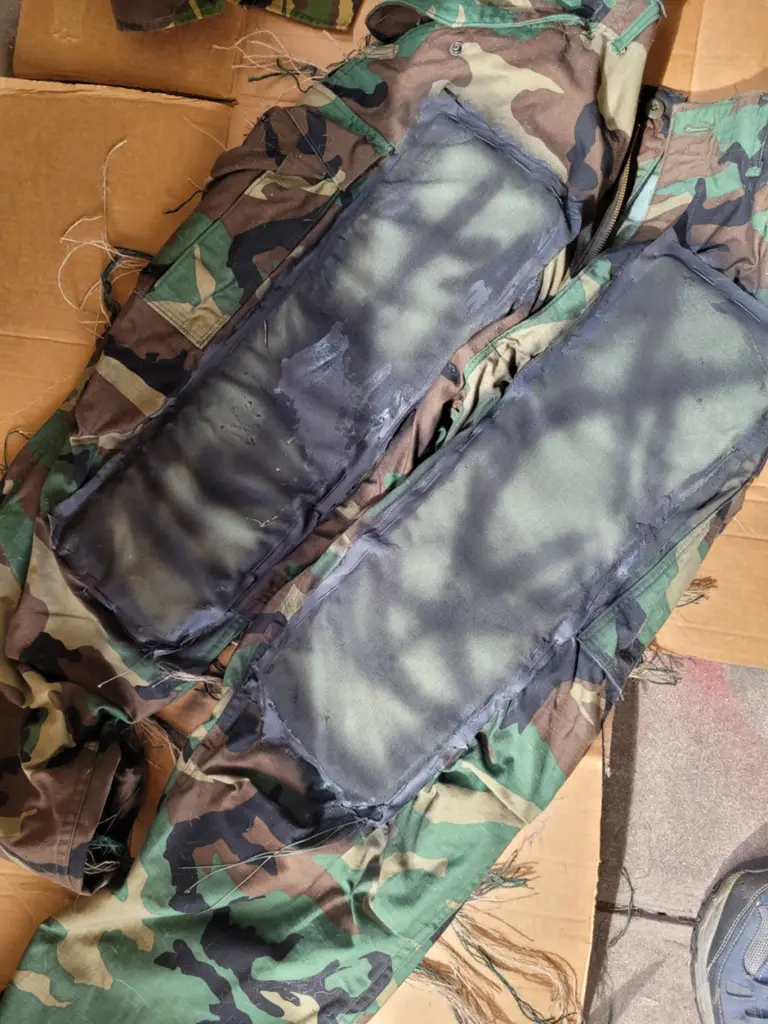
The next thing that I did was add padding to the chest area of the shirt, and the thigh and knee region of the pants.
I used individual closed cell foam knee pads. I needed three for each side of the shirt and two for each pant leg.
I used the Speedy Stitcher to sew the pads together first so that they would be easier to keep in place. I then put three pads on the inside of each side of the shirt, being sure to cover the holes I made from removing the pockets. I then attached the pads to the shirt using the Speedy Stitcher.
I wanted to put the leg pads on the inside of the pants legs, but I found this to be a pain in the butt. I couldn’t see where I was placing the needle, and the thread kept getting tangled up. Frustrating!
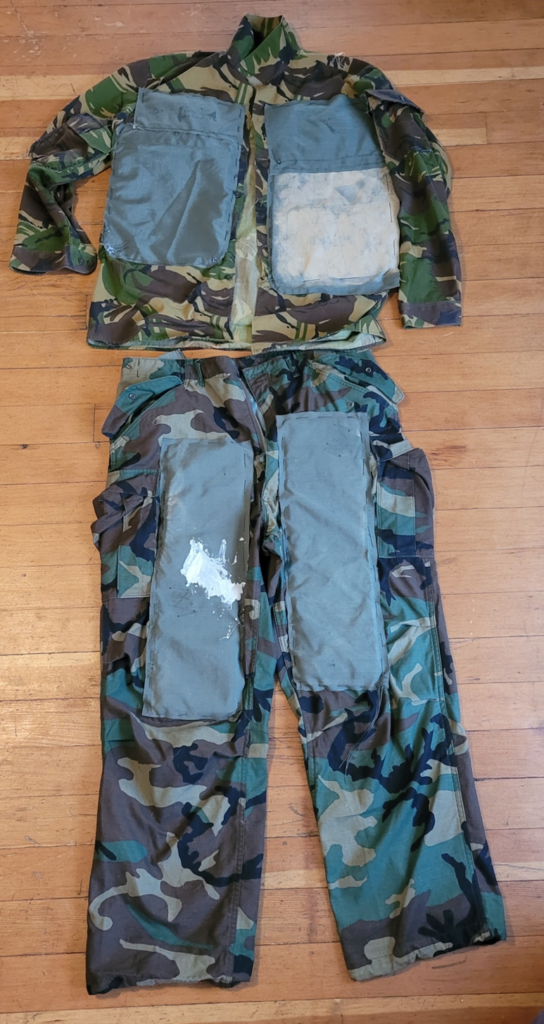
Instead, I put the pads on the outside and used the Speedy Stitcher to attach them so that they will cover the thigh and knee region. I may regret doing this down the road, but I just didn’t want to spend hours on each leg.
Step 5: Cover Padding with Canvas
Once the pads were on, it was time to reinforce those areas with canvas. Crawling over the ground is going to easily tear up the padding and the seams, so I want them protected.
I took a seam ripper and about an hour to completely take apart the military duffel bag. This left me with a nice big flat piece of durable canvas to work with.
I used a utility knife (razor blade) to cut out pieces of canvas that were large enough to cover the areas where there were holes on the shirt and the padding. The pieces were slightly oversized so that I wasn’t sewing them into the padding, but into the fabric of the clothing. This was to help minimize the thread from moving in the padding because the foam tears easily.
Once I had my pieces of canvas, I used the Speedy Stitcher (I love that tool!) to sew them onto the suit. You’ll notice that some of the pieces of canvas have paint and other stuff on them.
That’s because I bought the bag used, what can I say, I’m cheap! But it won’t be a big deal because I will be spray painting the suit later on, so that stuff will be covered.
Lastly, I took a tube of Shoe Goo to cover the seams where I sewed the canvas onto the BDUs. This is to help protect the seams from tearing and getting pulled on while crawling on the ground.
Be sure to wear gloves and use this stuff in a ventilated area because it stinks! An applicator, like a popsicle stick is also useful in spreading the stuff out. Once applied, I allowed the Goo to dry and harden for 24 hours.
When it was done, there was a nice, durable coat of sealant covering the thread. The Shoe Goo is glossy, so I will need to hit that with spray paint later on.
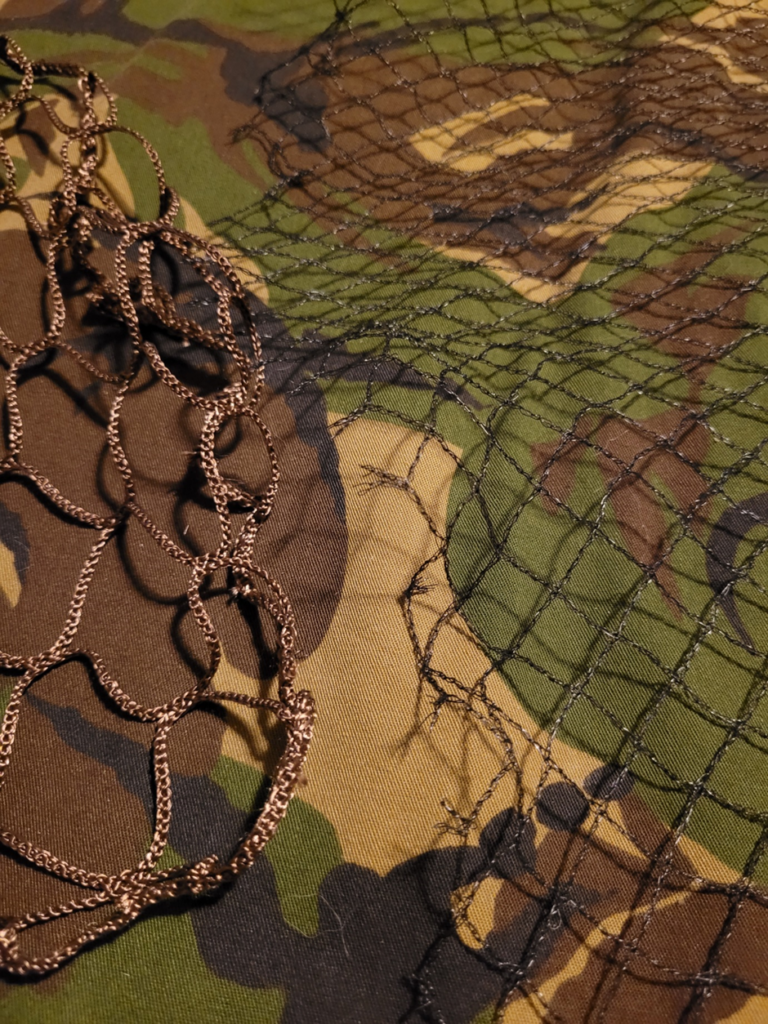
Step 6: Pick Your Netting
At this point, I decided to flip the suit over and start sewing on the netting. I picked up two different types of netting because I wasn’t sure which one I wanted to use.
The first one is a Ghillie Suit Net by Arturus (the brown one on the left side of the picture) And the second one is a type of gardening netting (the black one on the right)
I laid them both side by side on top of the BDUs for a better comparison. It might be difficult to tell from the picture, but the Arcturus netting is quite glossy, meaning it had a shiner surface than the black netting, which I didn’t want. And I thought the diamonds in the netting were a little too large for my liking.
So, I went with the black gardening netting.
Step 7: Measure Your Netting
I unrolled a large section of netting and placed it over the back of the shirt and pants and made sure it covered all of the areas I wanted it to.
Then I took a pair of scissors can trimmed off the excess from the around the edges so that the netting conformed to the shape of the shirt and pants.
Luckily, once I got the netting in place, I found out that it had some stretch to it, so it won’t be as difficult as I thought to weave in organic material.
Step 8: Attach the Netting
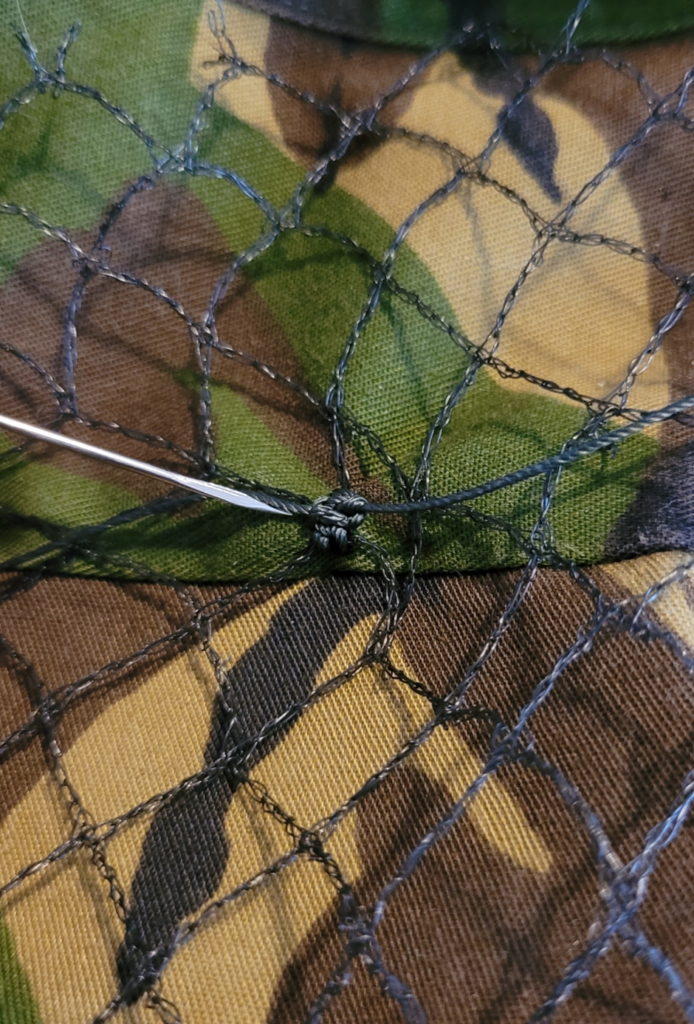
Now it’s time to attach the netting. I went back and forth between using the Speedy Stitcher or an upholstery needle. I decided against sewing long continuous lines (Speedy Stitcher method) and opted for sewing one point at a time with an upholstery needle.
I used the needle and the olive drab thread to sew and anchor the netting at various points around the material. I made several “X’s” through the material and over the netting before securing it with a couple of square knots.
Because the thread is nylon, it had a tendency to unravel itself after moving the uniform around a bit. This led me to use a single drop of crazy glue on each knot after it was completed.
Step 9: Prep Burlap Fibers and Jute Strands
Once I got the netting attached to the shirt and pants, I needed something to cover it with. It was time to prepare the burlap fibers and jute threads!
I had 4 burlap bags that were 40X23 inches and a few rolls of jute. I decided to take apart two burlap bags and use one roll of jute for the dying process. Jute and burlap will give you a “carpet moss” look.
Unfortunately, I forgot to take pictures of taking the burlap bags apart but it’s a simple yet time consuming process. To take them apart, I used scissors to cut off all the seams around the edge of the bag. This gave me one large piece of burlap material that I laid on the floor.
From here, it’s just a matter of pulling out all of the individual strands, which will certainly test your patience! You could just cut the burlap bag into long strips and pull out enough horizontal fabric until you have the desired look, but I thought that would be a waste of material.
Step 10: Dye Burlap and Jute Strands
Once I got the burlap material unraveled, it was time to give it some color. You can dye the material whatever color you want and use multiple colors as well. However, I decided to stick with just two colors. The natural brown color of the material (undyed) and a dark green.
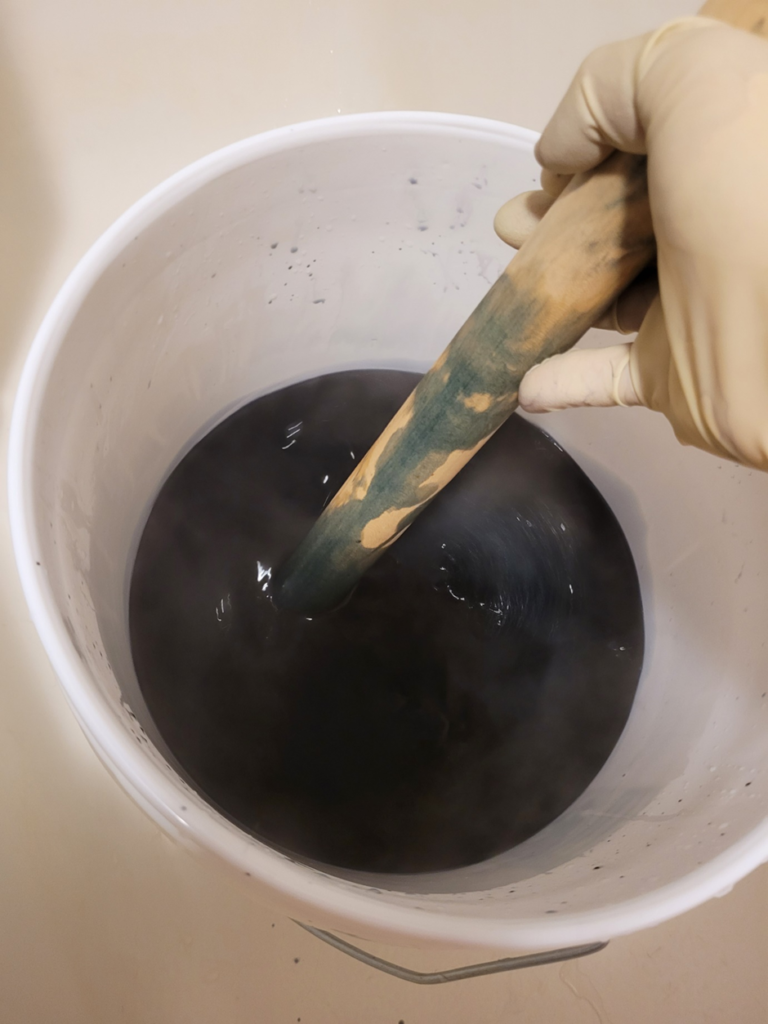
The Rit dye that I had can be used in a washing machine, but I wasn’t sure how the burlap and jute would hold up in a washing machine. Instead, I used a five-gallon bucket that I placed in my bathtub so clean up would be easier.
After snapping on some protective gloves, I filled the bucket with hot water and added the dye according to the instructions on the bottle. I threw in an unraveled roll of twine, the unraveled burlap (this was a big mistake!) and used a super special stirring stick (a piece of wood I found in the garage) to mix it all together.
I continuously mixed it all for about 15 minutes and let it sit on its own for another 40 minutes.
After 40 minutes I dumped the green soup out. This was when I noticed my big mistake. I shouldn’t have unraveled the burlap before dying because during the mixing process, all the strands got tangled and knotted together. More on this in a bit.
I then rinsed the material with cold water until the water ran clear. It took about 20 minutes’ worth of cold water from the shower head before the dye was all rinsed out.
Step 11: Allow Burlap and Jute Strands to Dry
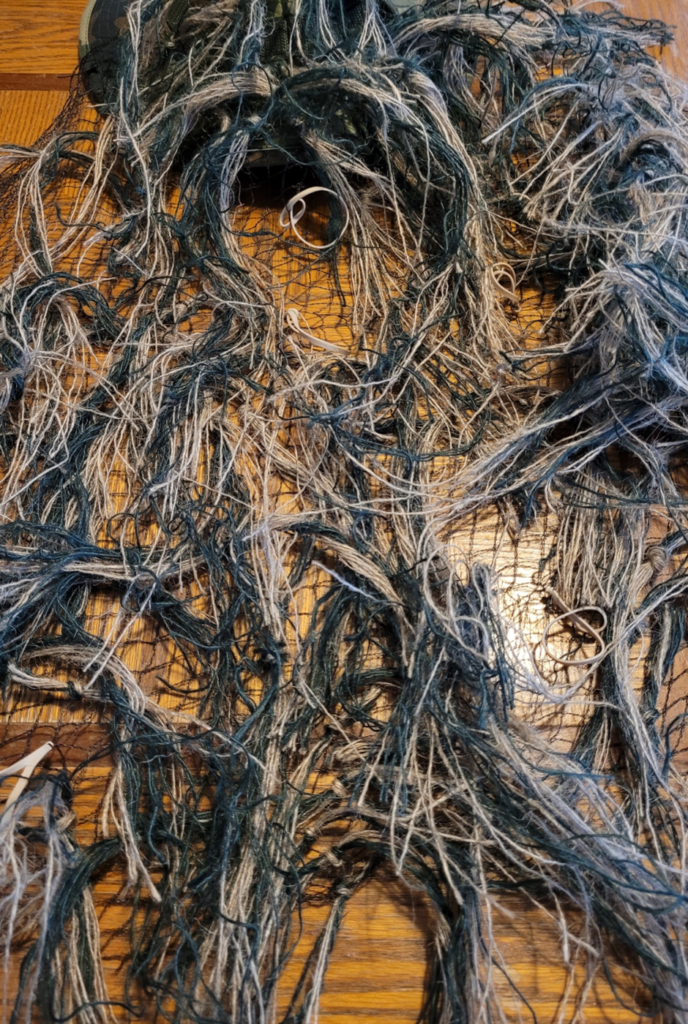
I squeezed out as much excess water as I could from the dyed material and laid it on a plastic sheet in front of a fan to dry. As you can see, all of the strands became one big, tangled, flippin’ mess!
I took about an hour or so to unravel and unknot as much of it as I could.
Step 12: Tie Material onto Netting
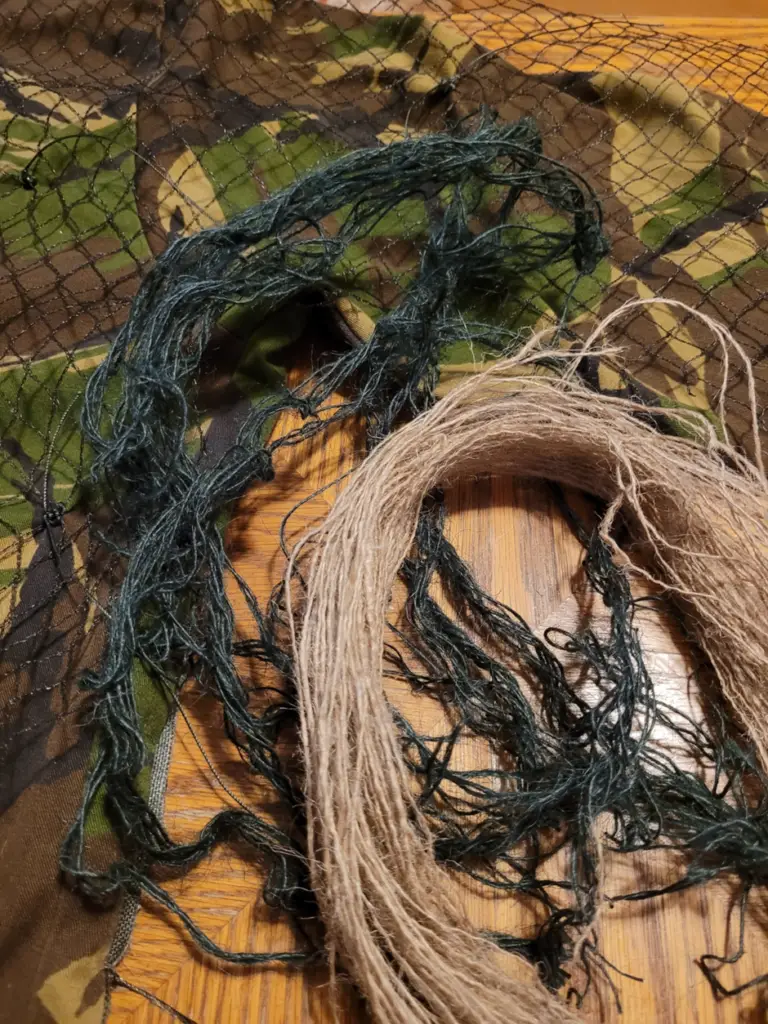
Below is a picture of the green material next to the undyed material:
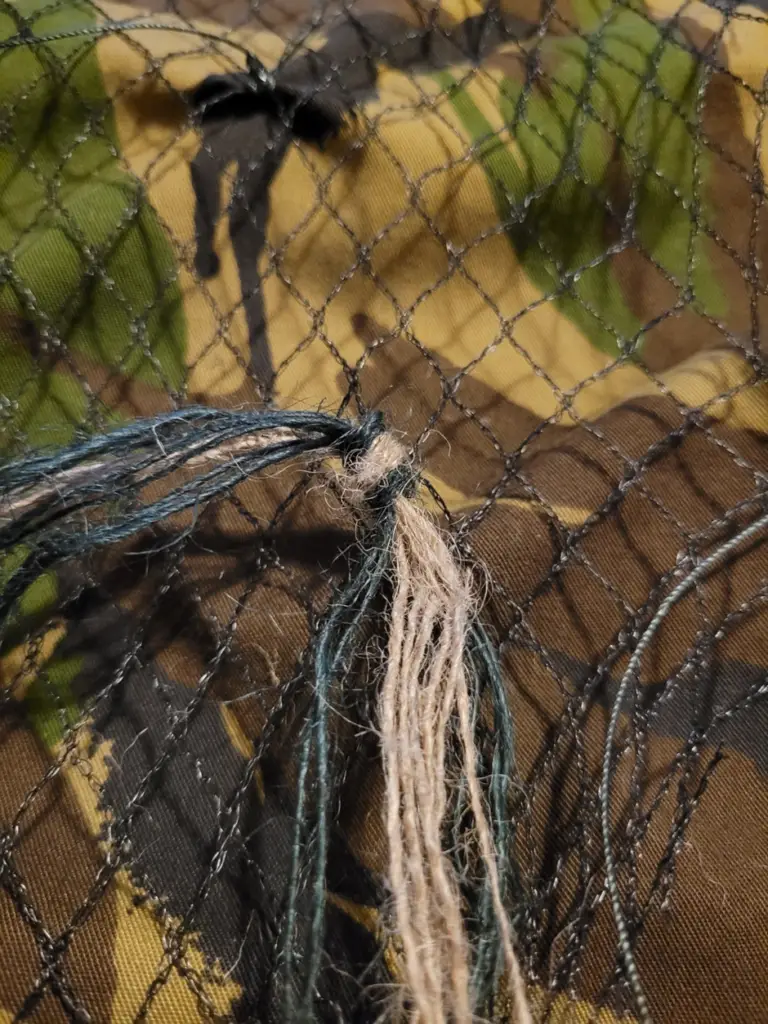
Once the dyed material was dry, the next step was to start tying it onto the netting. There isn’t really a specific recipe for this, I simply took a few strands of each color, threaded them under the netting and tied a square knot above the netting to secure it. I then did this over, and over, and over…
I did my best to alternate the directions in which I tied the knots so that the artificial vegetation look I was going for didn’t have a uniformed look to it.
Step 13: Check Out Your Work
I’m done! …not really. For some reason I thought I was done at this point, so I decided to take the suit outside and spray paint some areas.
Step 14: Spray Paint Shining Areas
I took the suit outside, laid down some cardboard and sprayed over the shiny seams from the Shoe Goo, the white paint from the used canvas bag, and any other areas that caught my eye.
Even though some of the canvas didn’t need to be covered, I sprayed several lines to help break up the solid color. While I didn’t do this, I would recommend getting several cans of different colored paint so that you can mix and match to create more earthy tones.
The black line that I created will end up sticking out so down the road I plan on fixing this with the above suggestion so that you can’t see the horizontal fabric or lines as easily.
Step 15: Repeat Process for Ghillie Hood
For the hat, or a ghillie hood, I basically repeated the same steps as I did with the ghillie suit.
I stretched out some netting in the form of a rough triangle shape so that the point as on the hat and the base of the triangle would be hanging down. I then took the upholstery needle and green thread and sewed the top part of the netting to the hat.
Once the netting was secured, I tied the jute and burlap strands in the same manner as I did with the ghillie suit. Sometimes I mixed and match the different colors and sometimes I used the same kind of color in one area. Below is the semi-finished product.
You can use more netting around the hat if you want and even create a veil for the front. For the time being I skipped that step.
Step 16: Add Rubber Bands to Netting
Another tip that I got from the Grey Bearded Green Beret was to add rubber bands throughout the netting. No ghillie suit is complete without natural vegetation added to it and the rubber bands will make adding that material in the field much easier.
To add the rubber bands, I slipped one end under and up through the netting and pulled it through the opposite loop of the band. I believe this is called a Larks Head.
As you can see, the tan colored rubber bands blend in quite nicely!
Putting It All Together
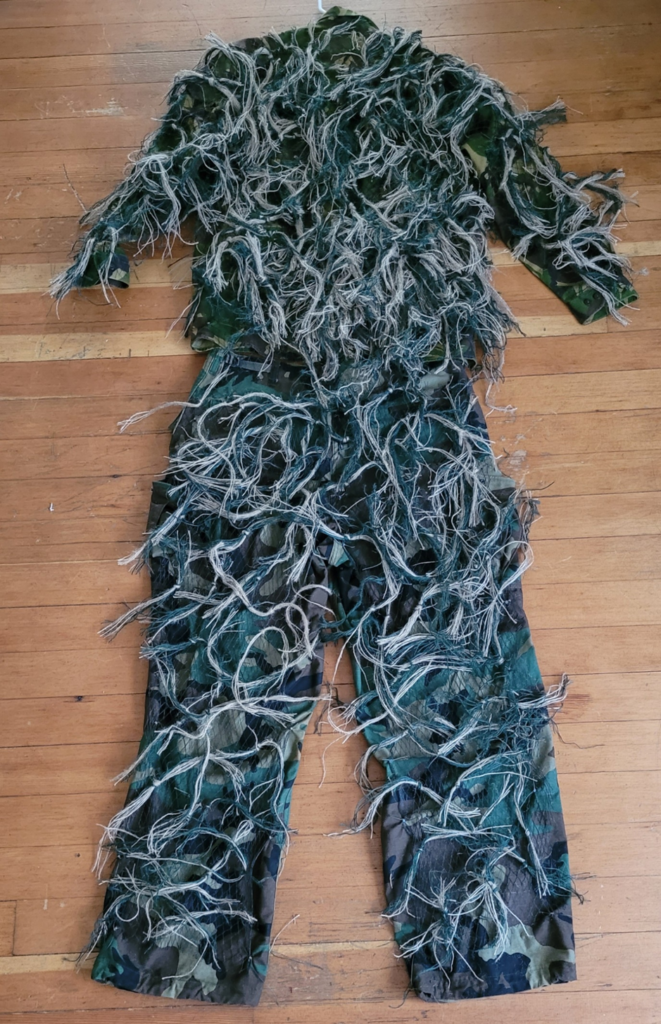
As I mentioned above, I wasn’t quite done adding material to the suit. The outline of the suit was still too defined, and I could see through the netting. Here is that picture again:
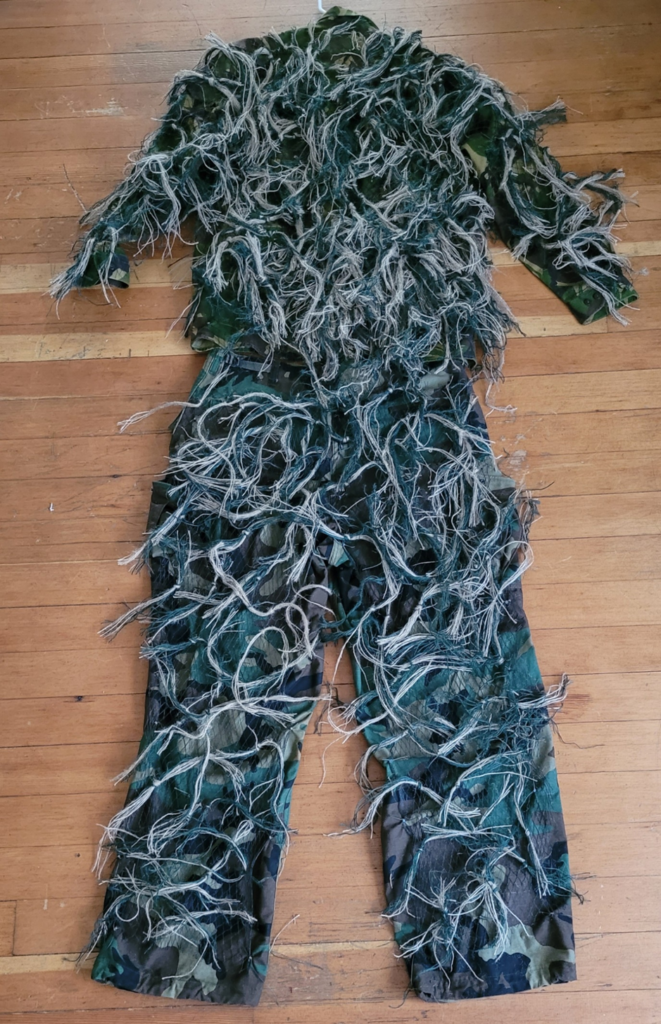
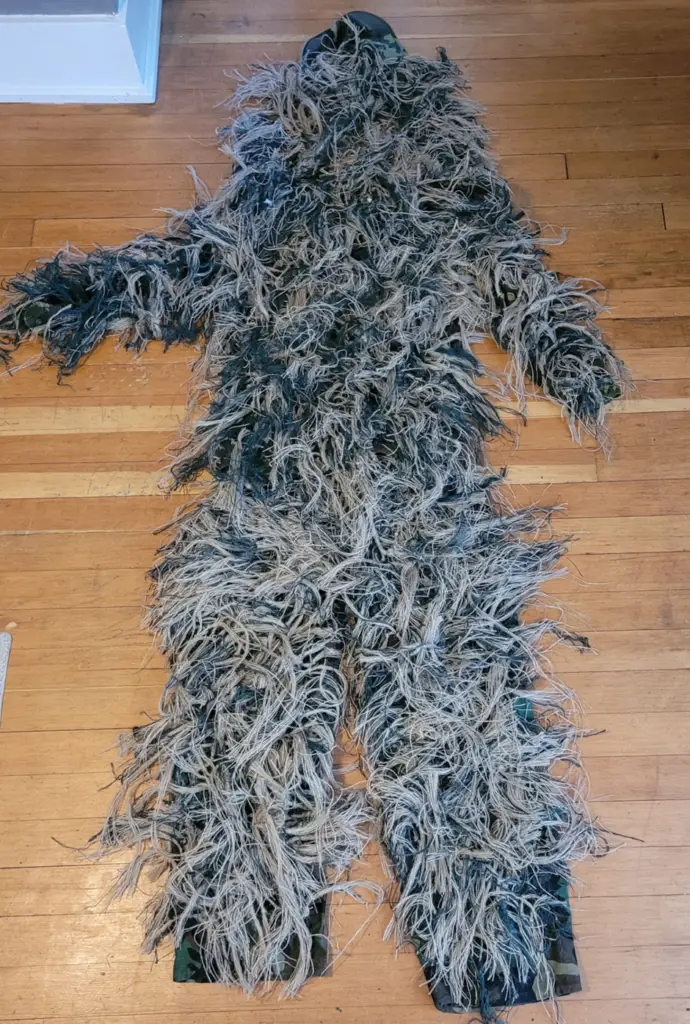
I spent some more time adding the rest of the material I had on hand to the suit and the hat and below is the “finished” product.
As you can see, the suit in the bottom picture is filled in with much more jute and burlap, but there are still a few areas that need some attention. Overall though, the edges of the human shape are hidden better than the first picture.
Even though this ghillie suit is “done,” remember that it won’t look right unless you add in some fresh vegetation each time you use it. This should only take about twenty minutes or so, and it will drastically help you to blend into the environment.
FAQs
How heavy is a ghillie suit?
Unless you buy a premade ghillie suit, they will all weigh different amounts because the material used and the amount of that material will be different from suit to suit.
Can you run in a ghillie suit?
This all depends on the size of the suit and the material hanging off of it. The one I made in this article is several times larger than the clothes I would normally wear, which means it would be a bit awkward and difficult to try and run in.
What I Would Do Differently
After I completed this project, I looked back on it and wondered if there was anything I would have done differently. Below are a few things I will keep in mind for next time, or to make the current suit better:
- Even though I will most likely be using this suit in woodland settings, I think I would have chosen BDUs or a base suit that were more neutral in colors, like a desert scheme.
- I would recommend finding a close cell foam sleeping mat that you can cut up rather than using the knee pads. The knee pads worked, but they were a bit annoying to work with since they were individual pieces.
- If you are going to be taking burlap bags or any other jute cord apart, dye it first.
- Using the Speedy Stitcher to attach the edges of the netting to the suit rather than using the upholstery needle probably would have been better.
- I will get several more cans of spray pain in different colors so that I can blend the color scheme better.
Final Thoughts
At this point, you may have noticed that I haven’t mentioned how long this project took me. Well, that’s because I wanted to save that little nugget to the very end.
I put 42 hours into this ghillie suit.
You read that right, 42 hours, and honestly, I think there is more that I could do to it, and I probably will.
Some people will probably think that is insane and will opt for shelling out a few bucks to purchase one instead. And there is nothing wrong with buying one, especially if you don’t have the this kind of time to devote to it or you don’t intend on using it all that much.
However, even though the materials and the time I put into this project make it a more expensive suit, I think mine looks better than most I have seen in the stores, there isn’t another one like it in the world, and there is always a sense of pride and accomplishment with any finished project.
I hope you enjoyed this project, thanks for reading, and as always, stay prepared.
P.S. If you plan on storing the ghillie suit in a closet with other clothing, it’s a good idea to wrap it up in a garbage bag and loosely tie the ends shut. The burlap and jute love to constantly shed little fibers that get everywhere!


