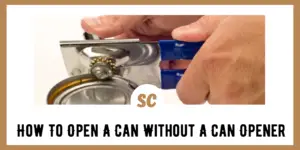
Canned foods are a staple item in most pantries, and they are a long-term food item most preppers recommend. This is because canned food is relatively affordable, comes in a variety of options, is pre-cooked, and – when stored properly – canned food will last many years.
All of these characteristics are great…unless you don’t have a can opener. You could find yourself in a situation where you forgot to pack one for a camping trip or your current can opener is broken.
Whatever the reason you find yourself without one, I’m going to be listing several alternative ways to remove a can’s lid without a can opener but I’m not going to stop there. I’m also going to list some other popularized methods that I don’t think are so great (even though they do work).
These extra can-opening “hacks” may come in handy if you find yourself in a dire emergency but otherwise, I wouldn’t recommend them. You could end up damaging your tools, contaminating the food, and even hurting yourself.
How To Open A Can Without A Can Opener, 6 ways
I would like to state that I have tried all of the methods listed below, which is why I broke them up into two different categories. When using any of the methods listed below, it’s a good idea to use gloves because you will be dealing with a lot of sharp edges. Try to work on a level, stable surface.
Pocket Knife (SAK)
I have carried a Swiss Army Knife for most of my life and love them for many reasons. Did you know that many Swiss Army Knife models have a can opener tool? I know that it may sound like cheating to list this one – but hey, when your hungry, who cares?
The hook of the opener goes on the outside of the can’s lid while the cutting portion is placed on the inner edge. Push the cutting portion of the tool down to create a puncture, and then work the tool up and down while rotating the can.
This works best if you have a stable surface while you work. When you are done cutting through the can’s lid, the entire lid should lift right out.
If you have a Swiss Army pocket knife but it doesn’t have one of the can-opening tools, you can use the knife blade. (I’ll talk more about that in a bit.)
Click on the video below to see the SAK can opener in action by Felix Immler, who also demonstrates how to do so in ten seconds flat!
Chopping Tool
This method works pretty well with an axe, hatchet, or tomahawk. You can either stand the can upright or lay it on its side, but just make sure the can is on a flat surface.
Use the pointed edge of the chopping surface to puncture a hole in the top of the can or on the side near the rim. Rotate the can while moving the chopping edge up and down until you have worked your way all around the can.
Check out the video below for a demonstration of this method.
Knife
First, place the can on a flat surface so that the can is either standing upright or on its side. Next, place the sharp tip of the knife near the rim on the inner edge and tap the butt of the knife with one hand. Once the tip has punctured, work the knife blade through the metal.
This method will dull or potentially damage your knife, and it is intentionally dangerous.
Check out the video below to see a demonstration of this method. In the video, he uses a butter knife, and although it’s a bit messier, the process is basically the same.
Tin Snips
Tin snips are great for cutting through softer metal, like an aluminum can, and this method feels almost like using a regular can opener.
Make a small cut into the top rim of the can until you can get the snips under the rim. Then simply work your way around the can, cutting the rim away. Once you have gone all around the can, carefully pry open the lid, and the can lid should lift right out.
Multitool
Like a Swiss Army Knife, some multitools come with a can opener and other tools, like a knife blade or a flathead screwdriver, that could be used to get to the can’s contents.
If the multitool has a pair of pliers, these can be used as well. Simply use the pliers to grab the rim and begin working it back and forth to tear it away. This method is tedious and will require some patience. Or you can just jab at the can’s lip with the pliers to create a puncture.
Click the video below to see another way to use pliers to open a can.
Spoon Method
Grab yourself a sturdy metal spoon and hold onto it close to the bowl (the part used to scoop up food).
Press the tip of the metal spoon firmly into the top of the can near the rim, you may have to work it back and forth a bit until it punctures. Once it does, continue moving the spoon along the puncture line of the can to pry open the top.
Check out the video below to see a demonstration of this method.
Not-So-Great Alternate Methods
I separated the methods below into this category not because they don’t work…but because I wouldn’t recommend them unless you have no other choice.
Concrete Slab
I have seen this method more times than I can count on social media and YouTube channels. There are two variations, but the concept is the same.
Grab yourself a flat rock with a rough surface and begin grinding away the can’s rim. This is going to take a bit of work and elbow grease, but once enough of the rim has been removed you can pop the top off. If you want to use a larger rough rock or concrete slab, flip the can upside down and vigorously rub the rim back and forth and in all directions.
I’m not a huge fan of this method because both of them produce a lot of metal shavings and at least some of them are probably going to get into the food inside. Also, with the concrete slab method, since the can is inverted you can lose liquid or food if you are not careful.
Metal File
This method is basically the same as the above, but instead of using a rock, you use a metal file to grind down the rim. Again, this is going to produce a lot of metal shavings, and I’m not confident all of them can be kept out of the food.
Instead, I would remove the handle, if possible, and use the pointed end of the file to puncture holes in the can and then pry open the lid.
Fork
This one involves sticking one of the fork’s tines on the inside of the rim and the rest of the tines on the outside of the can. Use the tine to puncture holes and wrench the fork around to pry open the lid.
My main issue with this is that it is a one-and-done method because it destroys the fork.
Below is a video of a slightly different version where the handle of the fork is used to puncture a hole and the tines are used to cut through the lid, but the fork still gets a bit messed up.
Hands
This method relies on brute strength with a hint of a safety hazard.
It goes a little something like this:
Using your fingertips, create two large dents in the can. Then hold the can between both hands, get a firm grip, and begin working the can back and forth. Eventually, the can is going to wear away at the crease point of the dent and you can “pop” it open.
My problem with this one is that if you get the timing wrong and your hand slips, you could end up slicing your hand open on some jagged edges. I would recommend that you wear gloves when trying this one out.
Conclusion
Aluminum cans are softer than you think, so all you need is a tool that is hard enough to puncture a hole, like a box cutter, screwdriver, awl, chef’s knife, or even a butter knife will work.
But none of these are the proper tools, and as I stated at the beginning, I really wouldn’t recommend most of them unless you had no other methods. If you have to use any of these methods, I would recommend grabbing yourself some gloves to help prevent injury.
At the time of writing this article, the average cost of a can opener is around $10. Grab yourself a couple of them, throw them in your kitchen drawer, and you won’t have to worry about how to open canned food without an opener.
Thanks for reading, and stay prepared.


