Years ago, I taught myself lock picking. This arose out of necessity rather than desire. I had lost the keys to a few different locks and after the first time calling a locksmith in, I wasn’t too keen on shelling out a bunch of money for something that took him a few minutes to undo.
This is when I familiarized myself with the tools of the trade and the inner workings of a lock.
In movies or television shows, they often portray characters picking locks with improvised tools, like bobby pins or paper clips. Of course, it usually looks super easy thanks to movie magic and time restrictions. Within seconds of using a lock pick, the lock turns, and the hero is set free.
Using an improvised tool like a paperclip is something I have never done, and I got to wondering if it was possible – and if so, how effective is it?
In this article, I’ll be tackling this topic for the first time with a fully illustrated walkthrough. We’ll break down:
- How lock picking works
- The anatomy and workings of a lock and key
- The best lock-picking materials
Please note that the following article is for informational purposes only, and in some areas owning lock picks can be against the law. Always check your local laws.
The Anatomy Of A Lock
There are a ton of different types of locks available today, but I’m going to be focusing on very simple ones you might find in a padlock or door knob.
Pictured above is what a simple lock looks like on the inside. At the top, you can see a series of springs. On the tip of the springs, there are pins. Most locks have at least five pins, but they can have more.
When a key is not inserted into the lock, the pins sit at different heights from one another. The objective is to press all of the pins down so that they line up with what is called the shear line. One of the jobs of a key is to quickly align all the pins.
When this is done there is no more tension preventing the inside from turning the lock. Once turned, the lock opens.
The Anatomy Of A Key
There are two main characteristics of a key you need to know about.
The first is that the bottom of the key is made up of teeth/ridges and notches. These are what align the pins along the shear line when a key is inserted into a lock.
The second part is the shoulder, which is the portion between the teeth and ridges and where you would hold the key. The shoulder provides the tension you need to turn and disengage the lock.
Create a Lock Pick And Tension Wrench Using Paper Clips
From the anatomy lesson above, we know that we are going to need two tools. One is used for putting pressure on the pins and one is used to create tension to turn the lock, this will be called the tension wrench. By making these, we can turn a lock in the same direction that a key would.
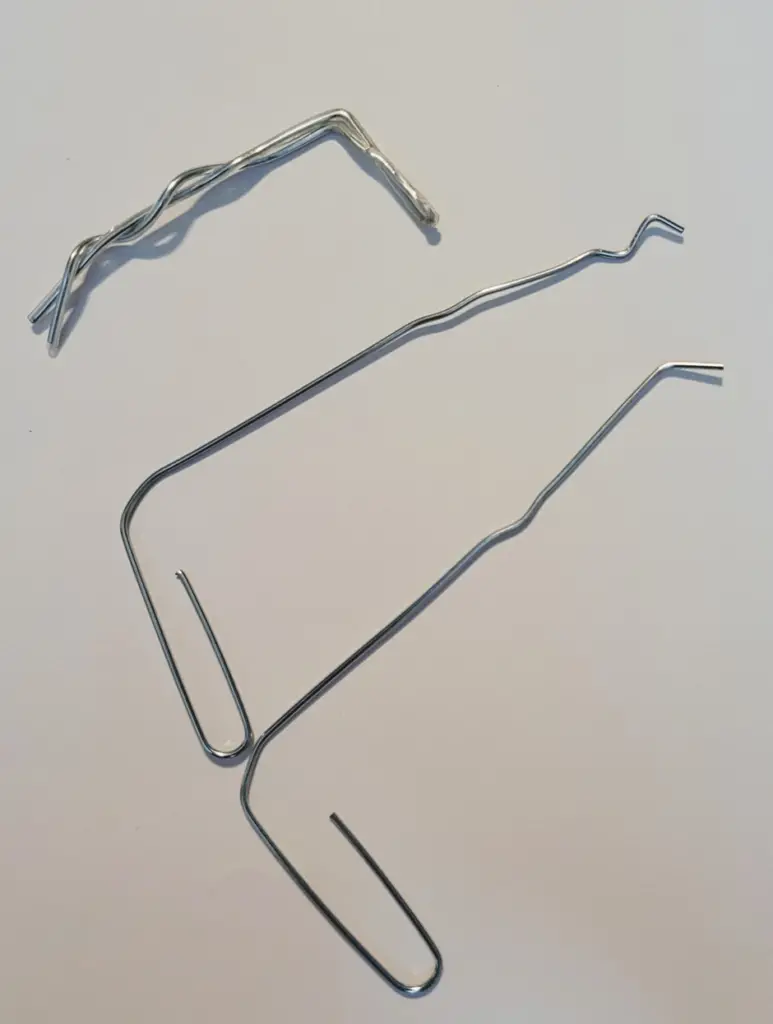
To create these, I am going to need two paper clips and a pair of needle nose pliers (a multitool will work as well). I will be using metal paper clips, not plastic paper clips. I’m going to start by making the tension wrench first and then a rake pick with the second paper clip.
I’m going to end up making two different picks plus the tension wrench, so that’s three total. However, you only need two paper clips if you just want one pick.
Making The Tension Wrench
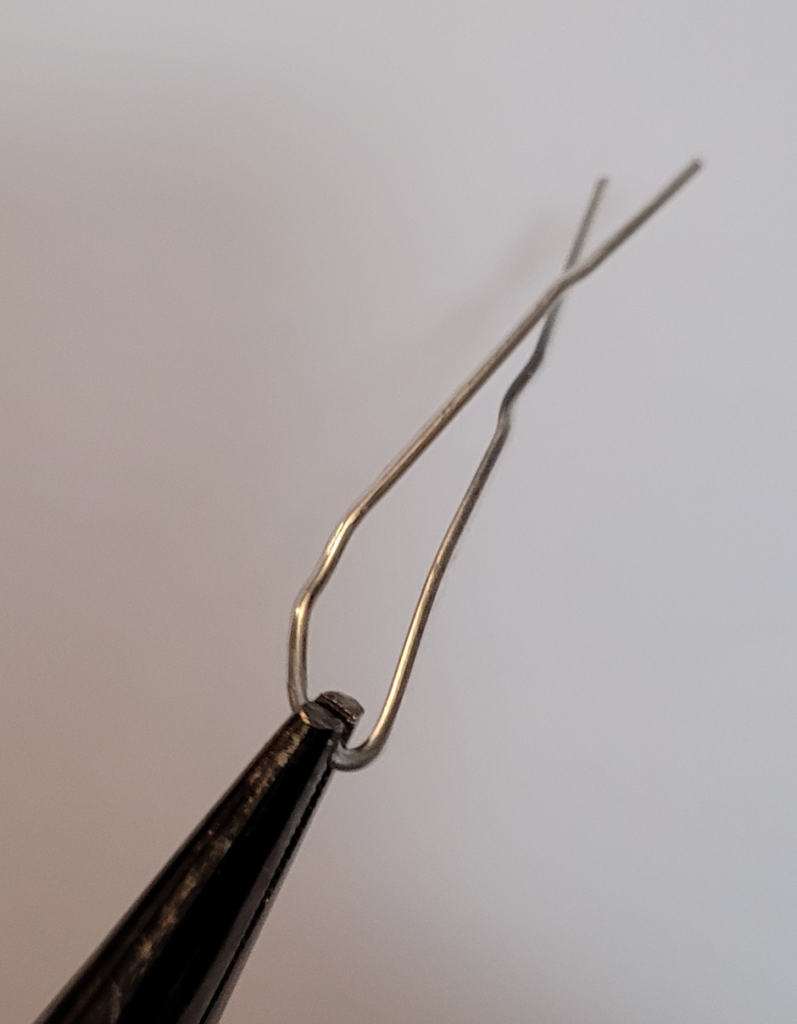
To make the tension wrench, first, unbend the whole paper clip so that is one straight piece.
Next, use the pliers to grab it in the middle and fold the paper clip in half so that you have two straight wires.
Now, compress the middle of the clip with the pliers so that it sits flatter.
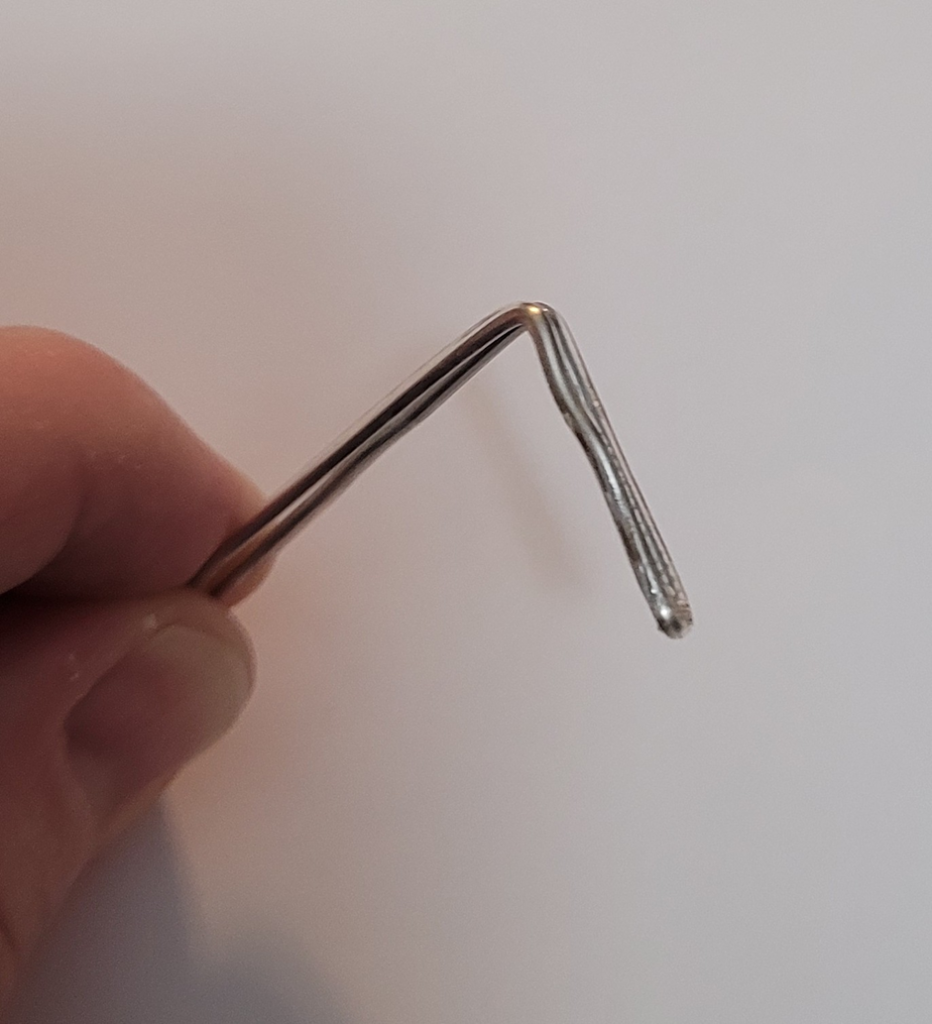
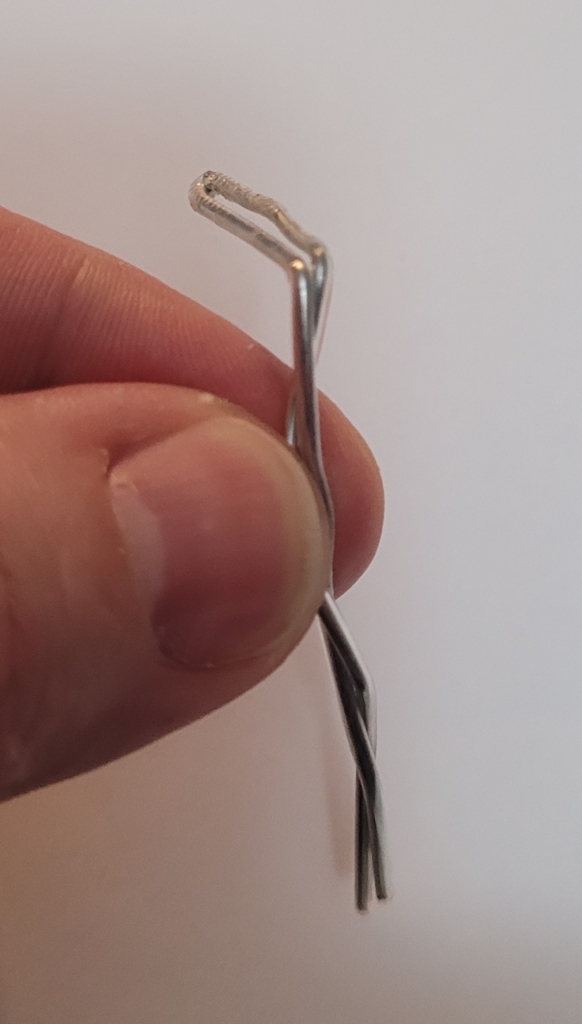
From this point, move the pliers back about half of an inch from the end and bend the paper clip to create a ninety-degree angle.
The tension wrench is now done, but there is a little housekeeping to complete if you want. The two wires are hanging out all loosey-goosey which is annoying and uncomfortable. You can either simply twist these ends around one another or tightly wrap them together with a bit of tape.
Making The Pick
There are two basic types of picks: 1)a feeler pick and 2)what is called a rake pick or snake pick. The rake pick is one of the most commonly used and most effective. Here’s how to make it.
First, unfold the second paperclip, leaving the last section curled.
Next, use the pliers to create a few ninety-degree bends in the straight end of the paper clip. And that’s all you need to do to make the rake.
The feeler pick is even simpler. Unfold the paper clip just like you did with the rake. Then simply use the pliers to make a small curved bend in the end. The feel pick is the one shown at the bottom of the picture below.
How To Pick A Lock With a PaperClip
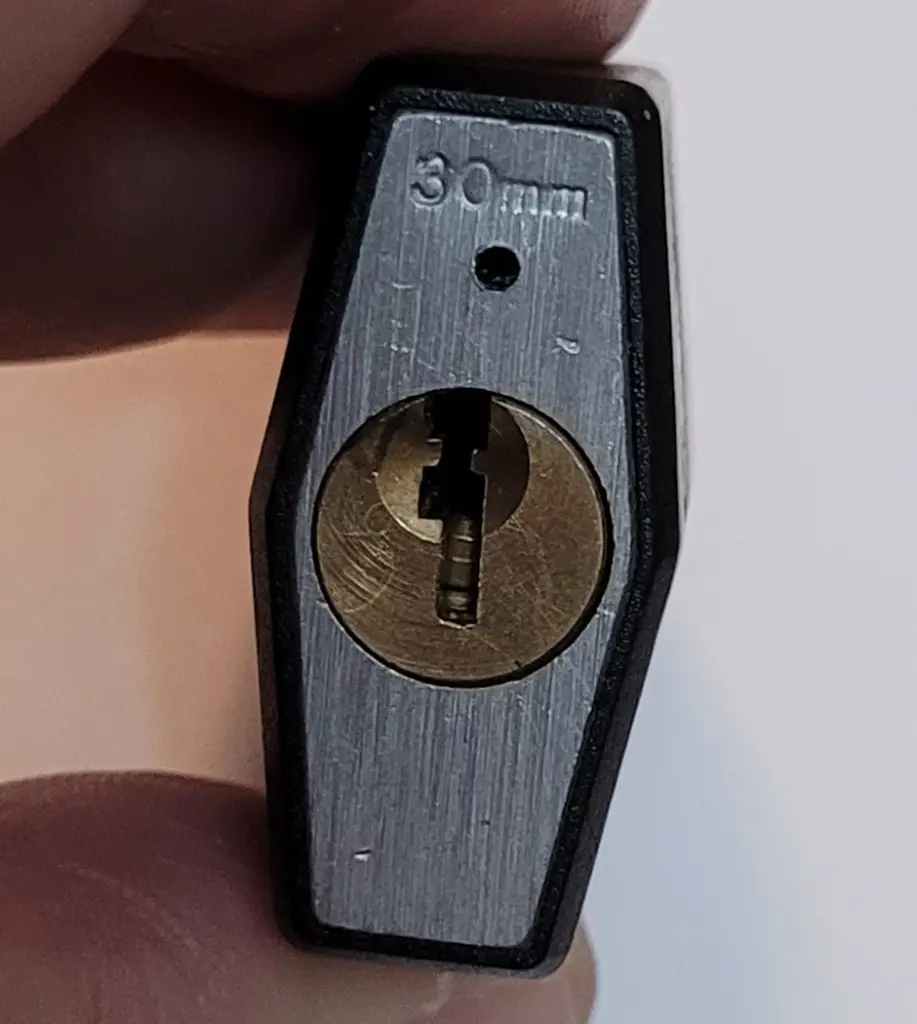
I know that it may be difficult to see in the picture above, but if you can look inside this small padlock, you can see the pins. The dark region at the top of the lock is where I will insert the tension wrench and the region at the bottom is where I will insert the rake to push the pins down.
Step One
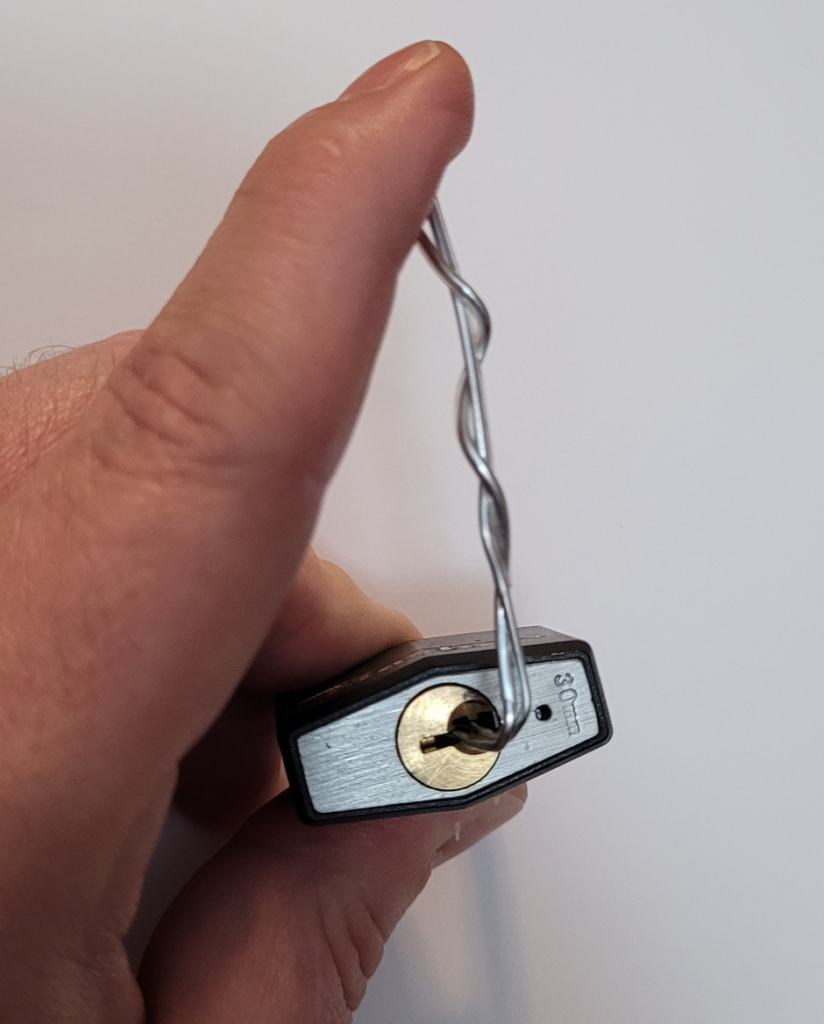
Insert the end of the tension wrench with the ninety-degree bend into the top of the lock. Hold the lock in one hand and place your index finger on the end of the wrench.
Most locks that I have dealt with turn clockwise but some may turn in the opposite direction, counter clockwise. If you don’t feel the lock move at all during your attempts, try switching the way the tension bar is pushed to find the right direction.
The wrench takes a bit to get used to and I think more than a few people will initially put too much pressure on it. When too much pressure is used the clip will start bending and once it’s bent it won’t work as well or at all.
Step Two
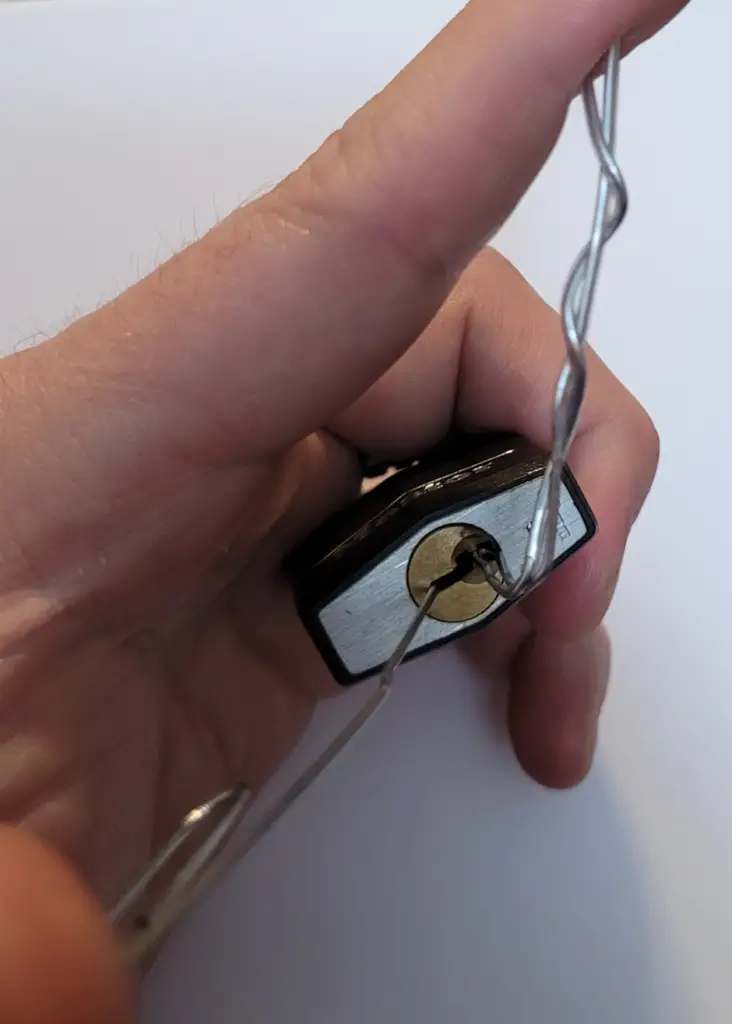
Insert the rake into the bottom of the lock. Now, it’s time to start picking.
Apply pressure to the wrench with your index finger – not a lot, but it needs to be constant.
Now, start moving the rake back and forth and up and down. Basically, jiggle it around a bunch.
Continue applying tension as you move the rake because you want just enough pressure to hold the pins in place once they are aligned with the shear line.
Once the pick has aligned each pin, rotate the wrench until you hear the lock snap open.
Open Sesame!
This can take a lot of practice to get used to or you may get lucky and unlock it on the first try.
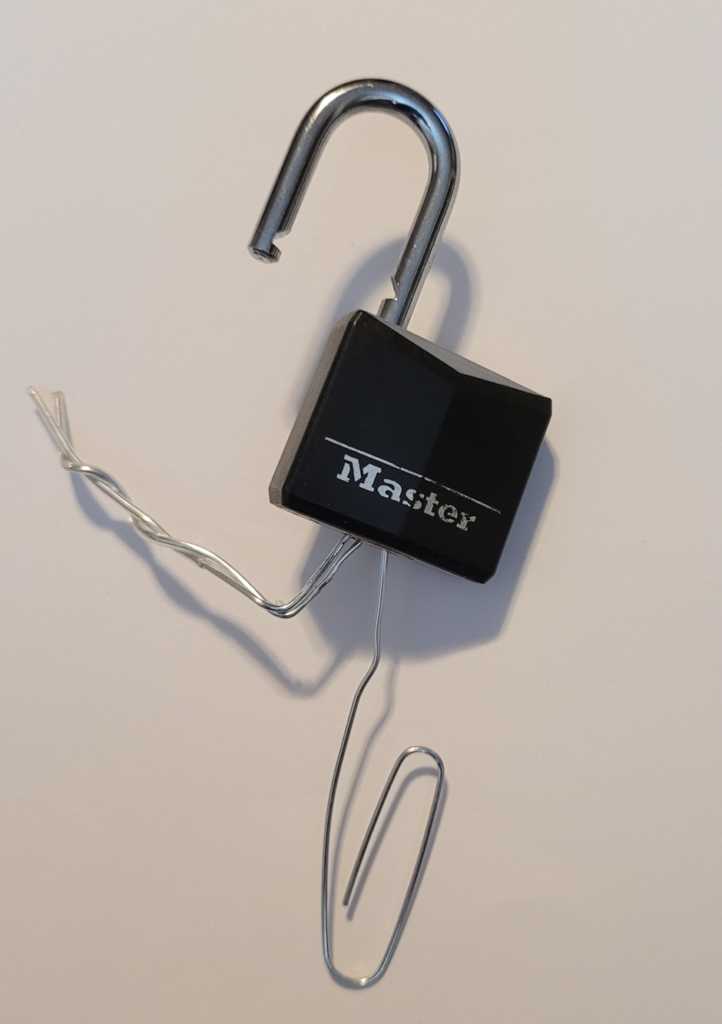
I started with the rake but wasn’t having much luck, so I switched to the feeler pick and within thirty seconds of my first attempt the lock popped open. As you can see from my picture above, it’s not locked anymore!
I got to say that I was kind of amazed that this worked. I mean, I figured it would…but after one end of the pick started bending, I did break it by pushing too hard and I started to lose confidence in this experiment.
After one end broke, I used less force, and it worked. Finding the right amount of force can be tricky, but it just takes practice.
Who would have thought, picking with a paperclip works!
FAQS
Will paper clips work on any kind of lock?
No. The lock shown in this article is fairly simple and cheap. Keys and locks come in many different shapes and sizes, and paper clips simply won’t work in many types. Also, most expensive locks are specifically designed to prevent lock picking.
Are paper clip lock picks reusable?
Yes, to an extent. The first time that I used the paper clip it worked great. However, I found out that the more I used it the more the clips bent, became weak, and didn’t work as well. Paperclips aren’t very strong to start with, so if you use them too much or use too much pressure, they will break.
Will paper clip lock picks damage a lock?
I don’t believe they will. I spent several hours using them on a few different locks and they are all still functioning just fine.
Locking It Up
Lock picking is one of those things that not only takes a lot of practice but patience. When I first started lock picking, I got extremely frustrated. I thought I would put the picks in, wiggle them around a bit and the lock would turn and I would be done.
Nope.
Since I was self-taught, it me a few days of picking locks before I got the hang of it and a locked padlock popped open. I then tried my front door and was amazed that it unlocked relatively easily.
If you want to pick locks that are simple, you can get started with some cheap picks. And as I found out in this article, even if you don’t have the right tool, you can pick a lock with a paperclip.
Not only is it a good skill to have, but it’s nice to know in case you ever lock yourself out of your house.
Thanks for reading and stay prepared!









![[VIDEO] Transforming an LMTV into the Ultimate Bugout Overlander – Part 5 [VIDEO] Transforming an LMTV into the Ultimate Bugout Overlander – Part 5](https://survivalcove.com/wp-content/uploads/2023/02/lmtv_article_edited-370x297.jpg)


