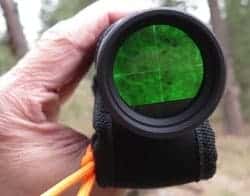
Thermal scopes are all the rage among varmint hunters who hunt at night. These amazing devices give varmint hunters the edge on nocturnal varmints such as coyotes, feral hogs, and other nighttime predators. However, getting ready to go with a new thermal scope presents some challenges. Many new thermal scope users don’t understand how to sight in a thermal scope.
Thermal scopes differ from traditional optical scopes. Traditional optical scopes depend on visible light to operate. Thermal scopes see heat and translate the heat images into images your eye can see. To sight in a thermal scope, you must have a target that emits a heat signature that you can use as an aiming point for the sighting process.
There are several different methods for sighting in a thermal scope. Understanding how your thermal scope operates is basic to using your scope effectively and sighting it in correctly. Most new thermal scopes offer options and features that make these devices extremely useful to nighttime and daytime hunters.
When is a Scope Not a Scope?
Although they are called scopes, technically, a thermal imager is an optoelectronic device and not a true scope. Scopes are usually optical devices that depend on ambient visible light waves to create an image that the shooter can see through the scope. This requires glass lenses to magnify and focus the image effectively.
Thermal imagers don’t depend on visible light to transfer an image of the target to the shooter’s eye. Instead, a thermal imager uses sophisticated electronics to gather heat signatures from a target and convert it into images that the human eye can see. Since thermal imagers don’t depend on visible light, they work as well at night as they do in the daytime.
The newest generations of thermal imaging scope can be used night or day. Unlike the old starlight scopes that amplify ambient light, thermal scopes have no bright light-sensitive components prohibiting their use in bright sunlight.
What you Need to Sight In a Thermal Scope
In many aspects, sighting in a thermal scope is like sighting in a traditional optical scope. You must adjust the scope’s windage and elevation to align the scope’s reticle with your target. This is usually done with the scope’s turrets, and on many thermal scopes, this is the method. However, some thermal scopes have innovative self-adjusting features that make the sighting process much quicker and easier.
The major difference between sighting in a thermal scope and a traditional optical scope is the target. Traditional optical scopes that use visible light require a target you can see easily and clearly when you look through the scope. Most shooters use specialized targets for sighting in a scope. These traditional targets often include grid lines to aid in the process. Sighting in a thermal scope is a bit different in many cases.
What Kind of Target Should you use for Sighting in a Thermal Scope?
To sight in a thermal scope, you need a target with a heat source at the aiming point. There are several options for these types of targets. Some require batteries to power the heat source. Others rely on heat from the sun to generate reflected thermal images to your thermal scope. Aside from these special targets, you must purchase, some alternatives may work for you.
Making your own thermal imaging targets can be a simple and easy project. You need a heat source, a supporting structure, and a way to create a small thermal image on the target. Many do-it-yourself thermal imaging targets designs are available. These ideas work well for many shooters.
Handwarmers as a Sighting Target
One of the most often mentioned DIY targets for sighting in your thermal scope is hand warmers. These small chemical warming packs are relatively cheap and can make a very effective thermal target. Most shooters prepare a piece of plywood as the target and drill a small hole in the plywood center. The hand warmer is activated and taped to the back of the plywood over the hole.
The temperature difference is easily detected by your thermal scope. Plywood is thick enough to prevent heat from bleeding through from the back. The hand warmers will stay warm for a long session of shooting with your thermal scope.
Use Tin Foil as Reflector
Many shooters routinely use a small sheet of aluminum foil as a target to sight in their thermal scopes. The technique seems to be very effective when done properly. Most shooters using this technique use an 8-inch x 11-inch sheet of aluminum foil. A piece of no-reflective material is pasted to the center of the tin foil. Heat reflects from the foil, and a distinct dark spot appears in the middle to provide an aiming spot.
Heating A Nail As an Aiming Spot
Some shooters use a standard aiming target. The heat source is created using a nail in the center of the target. The nail should protrude enough from the target enough to allow you to heat the nail. This takes a little care to keep from setting the background target on fire. One other disadvantage is keeping the nail hot enough to see. As the nail cools, the aiming point will become harder and harder to see through the thermal scope
Have Some Fun and Try Other Aiming Points
Technically, almost anything that can be heated can be used as an aiming point target. Some shooters report success with heating up and apple. The temperature doesn’t need to be great as the thermal scope easily detects the difference in heat signatures from objects in the field of view.
Even a can or a plastic bottle filled with warm water will often produce an appropriate aiming point for your thermal scope. This can add another dimension to your shooting fun while sighting in your thermal scope.
Can I Use a Laser Boresighter to sight in My Thermal Scope?
In general, laser boresighting tools won’t work with your thermal scope. The laser dot that is projected down range doesn’t produce enough heat differential for the thermal scope to detect the difference. Laser bore sighters are great when used with traditional optical riflescopes.
If your thermal imager is both daylight and nighttime compatible, you may be able to see the laser dot even during the daytime. You might be able to see the laser dot, but in bright sunshine, the laser dot will wash out quickly as it goes downrange.
In addition, laser bore sighters are ver low-power lasers. The range of these lasers is limited. Even if you can see the laser dot at longer ranges downrange, the dot expands and diffuses until it becomes so large and dim that it is unusable for aiming.
Tips to Sighting in Your Thermal Scope During the Daytime
Most hunters understand the basics of sighting in a rifle and scope combination. Zeroing your thermal scope is much like serving a traditional rifle scope with a few notable exceptions. TO make this process easier, these tips should make the job of zeroing your thermal scope a little easier and a little quicker.
Some of these tips apply to zeroing any scope, and some are necessary only with thermal scopes. In any case, you will benefit from all the information and knowledge you can gain about your rifle, your scope, and sighting in your rifle and scope.
Have Everything you Need Before You Start
Go to the range prepared. Nothing can ruin a day at the range more than forgetting something vital to your range time. Being prepared is especially true when you are working with a thermal scope. Ensure you have extra batteries or an auxiliary power source for your thermal scope. If your scope connects to your smart device with your thermal scope, keep a cable in your range bag, so it is always handy. Don’t forget ammunition, your safety equipment, and your targets.
Before you leave for the range, spending a little time to make sure you have everything you need can prevent frustration and delays. I like to keep a small notebook in my range bag. I track when I went to the range, what I was shooting, and any notes about things that I want to add to my range bag before I go back.
Prepare Your Targets Before you Get to the Range
To sight in a thermal scope, you must have a target able to create a heat source with a temperature differential that the thermal scope can detect. Whatever style you prefer, take everything you need to the range with extras if possible. Having your targets ready to deploy at the range can save you time. Being ready also keeps your range mates from having to wait while you prepare or build your thermal targets.
Set Up Your Shooting Position Before you Set up Your Targets
Before you go downrange to set up your thermal target, arrange your shooting position to avoid delays in getting your first shot downrange. Set up your spotting scope, any mats or pads, your rifle rest if you use one, and any other equipment. Be sure that your rifle is in a safe condition before you start downrange with your target.
Setting up your shooting station saves time. Most thermal targets have a relatively short life span once initiated or activated. Hand warmers will soon stop producing warmth. If you heat an object for an aiming point, the objects will quickly cool off. Thermal pinpoint targets may operate on batteries that will run down over time.
Take Your Shots and Make Your Adjustments
Once your target is set and activated, return to your shooting position. As soon as the Rangemaster gives the signal, send your first few rounds downrange. Make your adjustments and send your follow-up shots to the target. Refine your adjustments until your scope and rifle work together to produce the perfect shot.
The Technological Approach to Zeroing a Thermal Riflescope
ATN has long been known for innovation in the thermal imaging market. The electronic component of thermal imaging scopes allows q host of possibilities not available on a traditional optical scope. The ability to zero your rifle and scope combination with just one shot is a feature most hunters can appreciate.
This one-shot zero system does just what it says. You take one shot downrange. You adjust the reticle without moving your rifle, and the electronics in the thermal scope do the rest. Instantly, your scope will adjust the reticle to the point your shot struck the target.
Several other thermal imaging scope manufacturers now offer a similar type of self-adjusting reticle. Such features are why thermal imaging riflescopes are gaining popularity for both daytime and nighttime hunting.
Zeroing in your Thermal Scope for Different Profiles
One other advantage of most thermal imaging scopes is storing and retrieving different profiles for the scope. Basically, a profile is a set of ballistics and information about your file and the cartridge you are shooting. The advantage for hunters who use the same rifle but different cartridges and loads for different game animals is immense.
If you are hunting varmints like coyotes, the advantage of a fast flat bullet is well known. However, you may need a larger and heavier bullet for larger game animals such as deer or elk. With a traditional scope, changing bullets specifications means a trip to the range to re-zero your scope for the different cartridge characteristics.
Using a thermal imaging scope with multiple profiles, you can adjust the thermal scope for different cartridges and load characteristics. If you want to shoot a heavier bullet, there is no need to dial in adjustments on the turrets or head to the range to re-zero your rifle. You can simply load a different profile into the scope, making the adjustments for you.
Sighting in A Thermal Scope – Different but Much the Same as a Traditional Scope
Some shooters think a scope is a scope. However, when you upgrade to the world of thermal imaging, some differences can seriously impact your shooting strategies. Zeroing that thermal scope is one of them. Daylight thermal scope sighting takes a bit of preplanning and some extra equipment. If you understand the difference between your traditional optical scope and your thermal imaging scope, the processes are much the same.
Thermal scopes are all the rage among varmint hunters who hunt at night. These amazing devices give varmint hunters the edge on nocturnal varmints such as coyotes, feral hogs, and other nighttime predators. However, getting ready to go with a new thermal scope presents some challenges. Many new thermal scope users don’t understand how to sight in a thermal scope.
Thermal scopes differ from traditional optical scopes. Traditional optical scopes depend on visible light to operate. Thermal scopes see heat and translate the heat images into images your eye can see. To sight in a thermal scope, you must have a target that emits a heat signature that you can use as an aiming point for the sighting process.
There are several different methods for sighting in a thermal scope. Understanding how your thermal scope operates is basic to using your scope effectively and sighting it in correctly. Most new thermal scopes offer options and features that make these devices extremely useful to nighttime and daytime hunters.
When is a Scope Not a Scope?
Although they are called scopes, technically, a thermal imager is an optoelectronic device and not a true scope. Scopes are usually optical devices that depend on ambient visible light waves to create an image that the shooter can see through the scope. This requires glass lenses to magnify and focus the image effectively.
Thermal imagers don’t depend on visible light to transfer an image of the target to the shooter’s eye. Instead, a thermal imager uses sophisticated electronics to gather heat signatures from a target and convert it into images that the human eye can see. Since thermal imagers don’t depend on visible light, they work as well at night as they do in the daytime.
The newest generations of thermal imaging scope can be used night or day. Unlike the old starlight scopes that amplify ambient light, thermal scopes have no bright light-sensitive components prohibiting their use in bright sunlight.
What you Need to Sight In a Thermal Scope
In many aspects, sighting in a thermal scope is like sighting in a traditional optical scope. You must adjust the scope’s windage and elevation to align the scope’s reticle with your target. This is usually done with the scope’s turrets, and on many thermal scopes, this is the method. However, some thermal scopes have innovative self-adjusting features that make the sighting process much quicker and easier.
The major difference between sighting in a thermal scope and a traditional optical scope is the target. Traditional optical scopes that use visible light require a target you can see easily and clearly when you look through the scope. Most shooters use specialized targets for sighting in a scope. These traditional targets often include grid lines to aid in the process. Sighting in a thermal scope is a bit different in many cases.
What Kind of Target Should you use for Sighting in a Thermal Scope?
To sight in a thermal scope, you need a target with a heat source at the aiming point. There are several options for these types of targets. Some require batteries to power the heat source. Others rely on heat from the sun to generate reflected thermal images to your thermal scope. Aside from these special targets, you must purchase, some alternatives may work for you.
Making your own thermal imaging targets can be a simple and easy project. You need a heat source, a supporting structure, and a way to create a small thermal image on the target. Many do-it-yourself thermal imaging targets designs are available. These ideas work well for many shooters.
Handwarmers as a Sighting Target
One of the most often mentioned DIY targets for sighting in your thermal scope is hand warmers. These small chemical warming packs are relatively cheap and can make a very effective thermal target. Most shooters prepare a piece of plywood as the target and drill a small hole in the plywood center. The hand warmer is activated and taped to the back of the plywood over the hole.
The temperature difference is easily detected by your thermal scope. Plywood is thick enough to prevent heat from bleeding through from the back. The hand warmers will stay warm for a long session of shooting with your thermal scope.
Use Tin Foil as Reflector
Many shooters routinely use a small sheet of aluminum foil as a target to sight in their thermal scopes. The technique seems to be very effective when done properly. Most shooters using this technique use an 8-inch x 11-inch sheet of aluminum foil. A piece of no-reflective material is pasted to the center of the tin foil. Heat reflects from the foil, and a distinct dark spot appears in the middle to provide an aiming spot.
Heating A Nail As an Aiming Spot
Some shooters use a standard aiming target. The heat source is created using a nail in the center of the target. The nail should protrude enough from the target enough to allow you to heat the nail. This takes a little care to keep from setting the background target on fire. One other disadvantage is keeping the nail hot enough to see. As the nail cools, the aiming point will become harder and harder to see through the thermal scope
Have Some Fun and Try Other Aiming Points
Technically, almost anything that can be heated can be used as an aiming point target. Some shooters report success with heating up and apple. The temperature doesn’t need to be great as the thermal scope easily detects the difference in heat signatures from objects in the field of view.
Even a can or a plastic bottle filled with warm water will often produce an appropriate aiming point for your thermal scope. This can add another dimension to your shooting fun while sighting in your thermal scope.
Can I Use a Laser Boresighter to sight in My Thermal Scope?
In general, laser boresighting tools won’t work with your thermal scope. The laser dot that is projected down range doesn’t produce enough heat differential for the thermal scope to detect the difference. Laser bore sighters are great when used with traditional optical riflescopes.
If your thermal imager is both daylight and nighttime compatible, you may be able to see the laser dot even during the daytime. You might be able to see the laser dot, but in bright sunshine, the laser dot will wash out quickly as it goes downrange.
In addition, laser bore sighters are ver low-power lasers. The range of these lasers is limited. Even if you can see the laser dot at longer ranges downrange, the dot expands and diffuses until it becomes so large and dim that it is unusable for aiming.
Tips to Sighting in Your Thermal Scope During the Daytime
Most hunters understand the basics of sighting in a rifle and scope combination. Zeroing your thermal scope is much like serving a traditional rifle scope with a few notable exceptions. TO make this process easier, these tips should make the job of zeroing your thermal scope a little easier and a little quicker.
Some of these tips apply to zeroing any scope, and some are necessary only with thermal scopes. In any case, you will benefit from all the information and knowledge you can gain about your rifle, your scope, and sighting in your rifle and scope.
Have Everything you Need Before You Start
Go to the range prepared. Nothing can ruin a day at the range more than forgetting something vital to your range time. Being prepared is especially true when you are working with a thermal scope. Ensure you have extra batteries or an auxiliary power source for your thermal scope. If your scope connects to your smart device with your thermal scope, keep a cable in your range bag, so it is always handy. Don’t forget ammunition, your safety equipment, and your targets.
Before you leave for the range, spending a little time to make sure you have everything you need can prevent frustration and delays. I like to keep a small notebook in my range bag. I track when I went to the range, what I was shooting, and any notes about things that I want to add to my range bag before I go back.
Prepare Your Targets Before you Get to the Range
To sight in a thermal scope, you must have a target able to create a heat source with a temperature differential that the thermal scope can detect. Whatever style you prefer, take everything you need to the range with extras if possible. Having your targets ready to deploy at the range can save you time. Being ready also keeps your range mates from having to wait while you prepare or build your thermal targets.
Set Up Your Shooting Position Before you Set up Your Targets
Before you go downrange to set up your thermal target, arrange your shooting position to avoid delays in getting your first shot downrange. Set up your spotting scope, any mats or pads, your rifle rest if you use one, and any other equipment. Be sure that your rifle is in a safe condition before you start downrange with your target.
Setting up your shooting station saves time. Most thermal targets have a relatively short life span once initiated or activated. Hand warmers will soon stop producing warmth. If you heat an object for an aiming point, the objects will quickly cool off. Thermal pinpoint targets may operate on batteries that will run down over time.
Take Your Shots and Make Your Adjustments
Once your target is set and activated, return to your shooting position. As soon as the Rangemaster gives the signal, send your first few rounds downrange. Make your adjustments and send your follow-up shots to the target. Refine your adjustments until your scope and rifle work together to produce the perfect shot.


