If there is anyone thing that defines survivability, it’s doing the right thing at the right time.
There are times when we make things too complicated and others where we simplify them too much. The complicated ones can get us killed, by taking up too much time and effort, making it impossible for us to get everything done that we need to, in order to survive. But if we make it too simple, we may not do everything we need to, so that we can survive.
Take fire starting as an example. It seems like every survival instructor there is tries to come up with some new ways of starting a fire. That’s great, as it gives us an arsenal of options we can use if our primary fire starter is not available. But that doesn’t mean that we should accept starting a fire by rubbing a couple of dry clichés together as our norm. We need a simpler way. Save those complicated ones for when we have no other option.
Click HERE to Get the World’s Smallest Battery,
That Powers Your House For More Than 2 Days!
On the other hand, we often act like all that’s needed to keep us warm in the woods is that fire and some sort of hastily constructed simple shelter. If you’ve ever tried that, you’ll know that while it might, I repeat “might,” keep you from dying of hypothermia, it isn’t going to keep you comfortable.
It is possible to stay comfortably in the woods, even in the wintertime; but it’s going to take a bit more than a fire and a lean-to, or even a debris hut, especially if the weather is uncooperative. We need a more complete strategy for cold weather survival, especially if we find ourselves caught in a situation where we don’t have the necessary gear for survival.
Let’s Start with Clothing
Everyone knows about dressing warmly, so I’m not going to belabor the point. But what I will say is that people get caught in the cold, without their coats, all the time. As foolish as it might sound, they’ll walk off into the woods without a jacket, because it is comfortably warm. But that can change at any time, with the weather suddenly turning cold or rainy. When that happens, the coat that was left behind suddenly becomes very important.
Okay, so what do you do in that situation?
Keep Dry
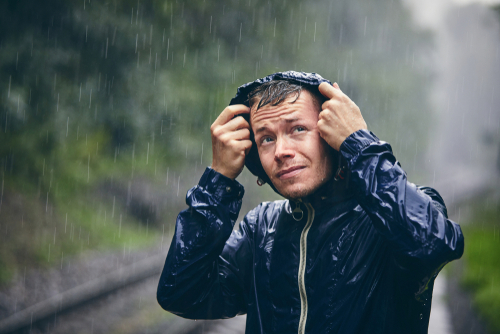
The single most important thing you can do to keep warm when you’re caught in the rain is to keep your clothes dry. Wet clothing will make you lose body heat much faster than if you weren’t wearing clothing at all. With a wet down jacket losing the contest in keeping you warm when wet. That wet down jacket will make you lose body heat 300 times faster. You’re better off without it.
There is one notable exception to wet clothing losing its insulating value, that’s virgin wool. Because wool fibers are hollow and virgin wool has a natural oily coating that repels water, it will retain roughly half its insulating value when wet. But, while that’s better than anything else, it’s still not all that good.
Most fabrics absorb water and aren’t all that good at drying out quickly. While there are a few fabrics that are pretty good at repelling water, unless you know which ones they are and dress in them, that little factoid really won’t help you. But even if you do wear clothing made out of those materials, they can become soaked if you fall in the water. All they do is repel water (water-resistant); they aren’t waterproof.
So if you’re caught in a rainstorm, find someplace which will provide you with overhead shelter from the rain. If the wind is blowing, then make sure that you have something that blocks the rain from coming in from that direction. Keeping your clothes dry will ultimately do more to keep you warm, than starting a fire or building a shelter will.
Make a “jacket” from the Trees
If you don’t have a jacket, you can make something to wear that will help shed water and hold in a bit of heat by using roots and branches. It might be a bit awkward to move around in and you’ll look like something that crawled out of fiction, but at least you won’t freeze to death.
Start by either finding a flexible, but strong branch or root and make a loop out of it that will go over your head and rest on your shoulders. You’re going to need to tie this together in some way, whether that is with paracord, your shoelaces, or some cord made by braiding long grass together. The loop will need to be strong enough to support the weight of branches hanging from it, without falling apart.
The next step is to cut a bunch of thin leafy branches, leaving a “Y” right near the cut. That Y will be used to hang the branches from the circle that you just made. Hang enough branches like this, so that they overlap each other, allowing them to shed water and block the wind. While this may not be a perfect raincoat, you’ll be much better off with it, than without.
Stuff Your Clothing
At its most basic level, insulation is about creating a lot of small air pockets. If you imagine a line of air pockets between your skin and the outside air, the pocket closest to your skin will be the same temperature as your skin. The one that’s the closest to the ambient air around you will be the same temperature as the ambient temperature. Going through the line of air pockets, we’d find that each one is a bit cooler than the one next to it on your body’s side and a bit warmer than the pocket on the ambient airside.
The more pockets that a particular garment or insulator has, the more of a temperature differential it can insulate for because there are more pockets to divide the difference up between. This keeps the cold farther from your body, helping to keep you warm.
If all you’re wearing is a shirt and pair of pants, you’ve basically got one air pocket between your skin and the outside air. You can increase this by stuffing your clothing with leaves or the tips of pine branches, much like a homeless person might stuff their clothing with crumpled up newspapers. While either the leaves or pine tips would be scratchy as all get out, they will act as insulation, providing additional layers of air pockets. Just make sure that you don’t stuff your clothing so full, as to collapse those air pockets.
Between stuffing your clothing and making a jacket or cape out of leafy branches, you should be able to do a lot towards keeping yourself warm, even without a jacket.
Shelter
The purpose of any shelter is two-fold, protecting us from rain and wind. Good winter shelters also provide some level of insulation, helping to keep warmth inside and the cold outside. How well the shelter you choose to construct does will have a huge impact on how warm you are.
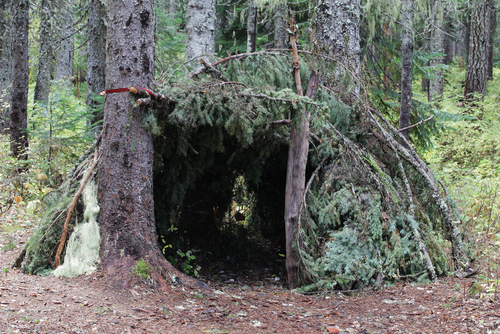
The debris shelter that is so popular amongst preppers is excellent in providing protection from the wind and rain, as well as providing pretty good insulation. Nevertheless, there is one big problem with the debris shelter as a winter shelter; that is, you can’t get any heat benefit from your fire inside the shelter.
That’s why I’m not real fond of the debris hut. While I would use one in an emergency, when I didn’t have either of the options I’m going to mention below, it’s not my first choice. Nor is a lean-to, as it leaves way too much open area for heat to escape through. Even a lean-to with the ends closed has the entire front side open to the ambient air.
Ideally, I’d like to have a shelter in the wintertime, where I can have a fire inside, even if it is a small one. That small fire will work to warm the inside of my shelter so that my body doesn’t have to do it all alone.
One of the most important points in constructing any sort of winter shelter is to make sure that the doorway is downwind. That way, you won’t have cold air blowing into it, every time you open the door. If the wind is shifting around, build a windbreak across the entryway to your shelter.
Pine Tree
One of the best emergency shelters in the winter is a large pine tree, one of those with the bottom branches brushing the ground. If you crawl under that tree, you’ll find that those branches which are brushing the ground are a good three feet off the ground at the trunk. Anything lower than that will be dead and can be cut off, making space that you can use for shelter.
But don’t stop there, cut off some branches from the pine trees around you and pile them against the base of the tree, increasing the density of pine needles available to block the wind. If there’s a lot of snow sitting on the ground, you can do the same thing with snow. Be sure to keep some of those branches to block the entryway.
The other important thing to do is to clear out some of the dead, dry pine needles, exposing the bare earth. Those needles you shovel to one side can be used to make your bed, helping to keep you off the ground. But you need that bare spot to start a fire.
Granted, you can’t have a very big fire under that tree, or there’s a chance that you’ll set the tree on fire. But you can make enough of a fire to warm some water, cook some food and take the chill out of the air. Even getting the temperature up to freezing can feel warm, if it’s below zero outside.
Sapling Hut
Of course, there are plenty of places where there are no pine trees to use as shelter. In that case, a sapling hut might be the way to go. This is a hut, which has a structure made by bending saplings together at the top and tying them together. Boughs can then be cut from nearby trees and tied to the saplings, making a dome-shaped shelter. As with using a pine tree, piling forest debris, branches, and even snow around the hut will help to keep it warm.
The sapling hut can provide a considerable amount of space, and as long as there is a small smoke hole at the peak, a fire can be lit inside, allowing it to be warmed considerably. In fact, a larger fire can be made inside a sapling hut, than can be made under a pine tree. But the best yet is that having that fire inside the shelter will do more to help keep you warm than any fire outside can do. Just be careful to keep it small and under control, so it can’t burn down your shelter.
Always Use a Windbreak

While you’re working to stay dry, also try to stay out of the wind. The wind cools us in two distinct ways. One is that it promotes evaporation. So if your clothing is wet, it will increase the speed of evaporation, which requires that it draw more heat out of your body. While that might be great in the summertime, when you’re hot, it’s not so good in the cold of winter.
The other way that wind cools is by blowing away the air that we’ve warmed with body heat. Going back to our example of how insulation works, the wind blows away all those warmer air pockets, replacing them with cold ambient air. Then your body has to start all over again, heating that air up.
The solution is to stay out of the wind. That’s one of the things your shelter is supposed to do for you. But even without shelter, there are a lot of things you can do to stay out of the wind or to block it. That’s the job of a windbreak, which can be anything from big rock to a copse of trees to a structure you build yourself.
This is one of the great uses of a rescue blanket. The thin aluminized Mylar material (actually, it’s usually a different type of plastic, but the idea is the same) is rather strong, so it can be stretched between trees to make an effective windbreak, just as long as you don’t puncture or rip it.
When using a rescue blanket for a windbreak, be sure to put it at a slight angle to the wind, rather than directly across the wind. That reduces the stress on it, by using it to redirect the wind, rather than expecting it to stop the wind entirely. It may take more blankets to construct an effective windbreak that way, but it will be a more effective one.
Windbreaks can also be made out of a stack of logs, although that is much more work. Nevertheless, if you’re cutting wood for a fire anyway, you may as well stack it in such a way as to use it as either a windbreak or a heat reflector too.
Add a Heat Reflector
Heat reflectors are something I don’t bother with unless it is extremely cold and my fire is outside my shelter. But if that’s what I have to do, such as being in a situation where I can only make a lean-to, then I will make sure to build a heat reflector behind the fire.
The term “heat reflector” is actually a bit of a misnomer, in that most materials don’t really radiate heat. What it does instead is to absorb heat, which it then radiates back out in your direction. Nevertheless, the results are essentially the same, providing you more heat from that fire.
Building a windbreak and a heat reflector, in addition to your shelter and fire, may seem like an awful lot of “extra” work in setting up camp. But we’re talking about a situation here, where you might not survive if you don’t take those extra precautions. The temperature can drop quite a bit in the woods at night, so you need to take all the precautions you can. Ultimately, it’s about making sure you survive.
Sleep with the Rocks
One final point I’d like to make here; that’s the value of sleeping with hot rocks. Since you’re going to be building a fire anyway, you can easily heat some rocks in the coals. I’m not talking about the rocks that make up your fire ring, but rather some additional ones. Then, when it’s time to go to sleep, you can move those heated rocks to your bed, allowing them to help keep you warm. Just be careful to have some cloth between yourself and them, so that you don’t get burned.