In the first part of this article, we listed some common plants that can be turned into flour, accessible to virtually everyone. Today, we will continue with another selection of plants that can be successfully used for your flour-making process, regardless of your intended use for the obtained flour, whether it’s for long-term storage or baking delicious pastries. Let’s move forward and explore these plants.

Plants you can turn into flour (continued):
Dandelion
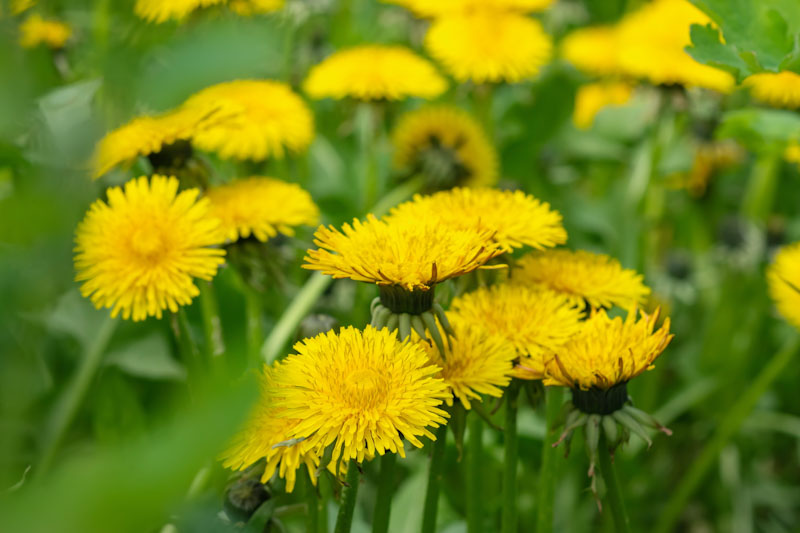
While dandelions (Taraxacum officinale) have been consumed for various purposes, including as a food source, historical records of their use specifically for flour in the United States are not well-documented. Dandelions have a long history of culinary and medicinal use, and they were likely utilized by Native American communities and early European settlers. As I’ve mentioned in my previous articles, dandelion leaves are edible and have traditionally been used in salads, although not everyone may like their taste. The roots are also edible and were mostly used to make “cowboy coffee” (the roasted roots were used as a coffee substitute). However, using dandelion roots specifically for flour is not a well-established tradition in the United States, and it was a practice employed when food was scarce.
Where to find in the United States: Dandelions are widespread and can be found throughout the United States, often in lawns, fields, meadows, and disturbed areas.
Identification: Dandelion leaves are deeply lobed, forming a rosette close to the ground. The plant produces a hollow, smooth stem that can grow up to 18 inches in height. Yellow, composite flowers form a characteristic “puffball” of seeds after flowering. I recommend harvesting the roots in late fall or early spring when the plant has most of its chemical compounds stored in its roots. Dig around the base of the dandelion plant, loosening the soil to extract the taproot.
Flour-making process:
Cleaning: Wash the harvested dandelion roots thoroughly to remove dirt and debris.
Drying: Allow the cleaned roots to air dry or use a dehydrator until they become hard and brittle.
Roasting (optional): For a deeper flavor, you can roast the dried roots in an oven.
Grinding: Grind the dried and/or roasted dandelion roots into flour using a grain mill or a high-powered blender.
Notes: Dandelion root flour has a slightly bitter, nutty flavor, and not everyone may enjoy its taste. However, it can be mixed with other flours for baking goods or as a thickening agent in soups and stews. Dandelion greens are also edible and nutritious, and they can be used in salads or cooked as a side dish.
Millet
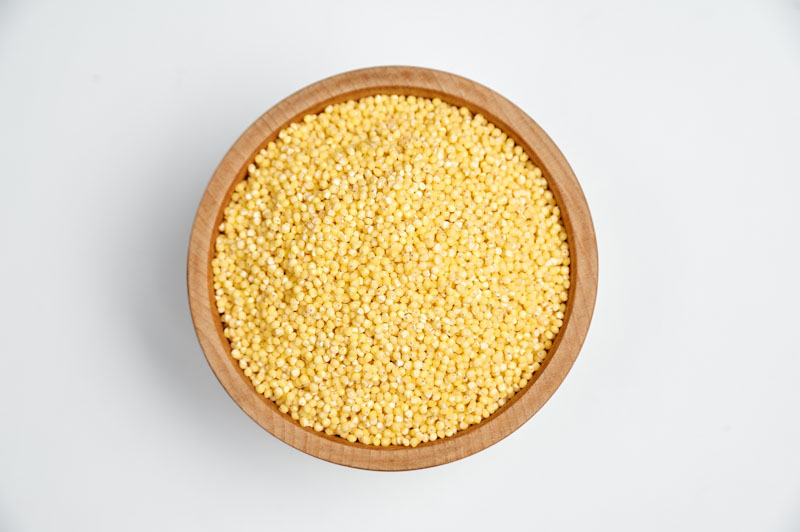
Millet (Panicum miliaceum) has a long history of cultivation and use, with evidence of its cultivation dating back to ancient times in Africa and Asia. It was introduced to the United States by early European settlers, and it has been a part of traditional diets in various cultures.
Millet is a versatile grain that can be used for flour, as well as in whole form in dishes like porridge and pilafs. In the United States, millet flour has gained popularity, especially in the context of gluten-free baking. Millet flour is often used in combination with other gluten-free flour to create a balanced texture and flavor in baked goods.
Where to find in the United States: Millet is cultivated rather than found in the wild in the United States. It is grown as a crop in various regions, and specific varieties may be suited to different climates.
Identification: Millet plants vary in appearance based on the specific variety, but generally, they are grass-like with tall, slender stems. The plant produces small, compact seed heads that can range in color from yellow to red, depending on the variety. The seeds of millet are used to make flour. Millet is ready for harvest when the seed heads have turned golden brown, and the seeds are firm and fully developed. Harvest the seed heads by cutting them at the base of the plant.
Flour-making process:
Threshing: Remove the seeds from the millet seed heads. This can be done by crushing the seed heads or using a threshing tool.
Cleaning: Remove any remaining chaff or debris from the seeds.
Drying (if necessary): If the seeds have a higher moisture content, allow them to dry in a well-ventilated area until they are sufficiently dry for milling.
Grinding: Grind the cleaned and dried millet seeds into flour using a grain mill or a high-powered blender.
Notes: Millet flour has a mild, slightly sweet flavor and is gluten-free. It can be used in a variety of recipes, including bread and pancakes, and as a base for gluten-free flour blends. Millet is a nutritious grain rich in protein, fiber, and essential minerals.
Quinoa
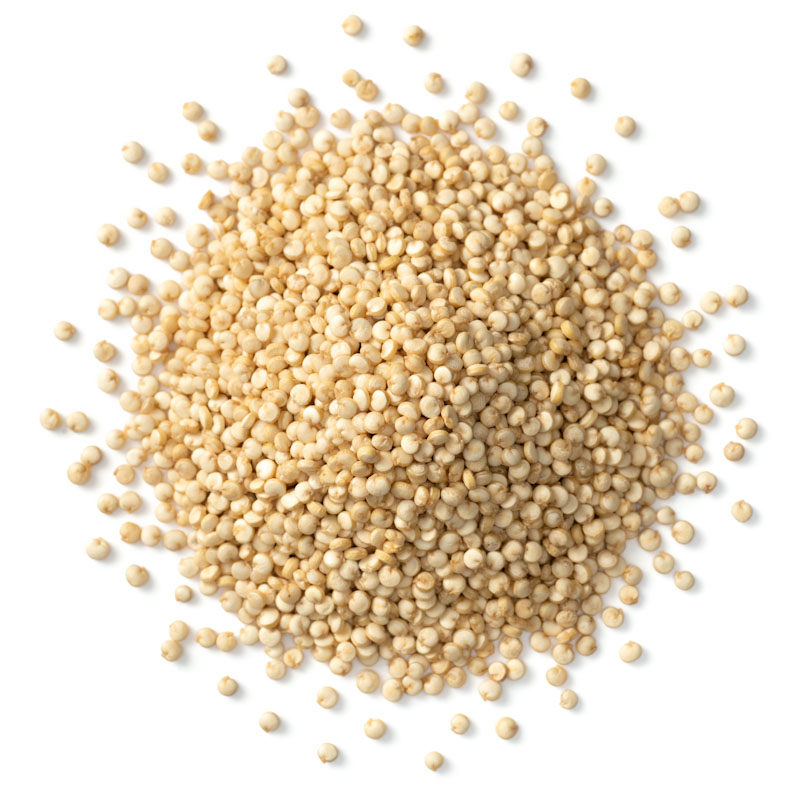
Quinoa (Chenopodium quinoa) has a rich history that dates back thousands of years in the Andean region of South America, where it has been a staple food for indigenous peoples. In the United States, quinoa has gained widespread popularity in recent decades as part of the broader interest in diverse and nutritious foods.
Quinoa was introduced to the U.S. market as a health food, and its consumption grew significantly due to its unique nutritional profile. Quinoa is a complete protein, and it’s the preferred choice for those who have a vegan diet. It contains all nine essential amino acids, and it is considered one of the most valuable sources of plant-based protein.
Where to find in the United States:
Quinoa is not native to the United States, but it is commonly cultivated. It is grown in various regions, including the Rocky Mountains, the Pacific Northwest, and parts of the Midwest. It has also escaped cultivation, and it can be found in various wild regions. Additionally, it can be found in grocery stores as a commercially available product.
Identification: Quinoa plants are typically 3 to 6 feet tall with broad, serrated leaves. The plant produces clusters of small, bead-like seeds that can vary in color, including white, red, black, and tri-color varieties. The seeds of quinoa are used to make flour. Quinoa is ready for harvest when the seed heads have turned from green to yellow and the seeds have a slightly bitter taste. Harvest the entire seed head by cutting the stalks below the seed heads.
Flour-making process:
Threshing: Remove the seeds from the quinoa seed heads. This can be done by rubbing the seed heads or using a threshing tool.
Cleaning: Rinse the seeds thoroughly to remove the bitter saponin coating. Most commercially available quinoa is pre-rinsed, but home-harvested quinoa requires rinsing.
Drying (if necessary): Allow the rinsed quinoa seeds to dry completely to prevent mold.
Grinding: Grind the cleaned and dried quinoa seeds into flour using a grain mill or a high-powered blender.
Notes: Quinoa flour has a mild, slightly nutty flavor and is gluten-free. It is a complete protein, and it’s ideal for long-term storage. Quinoa flour can be used in baking, as a thickening agent, or as a base for gluten-free flour blends.
Ryegrass
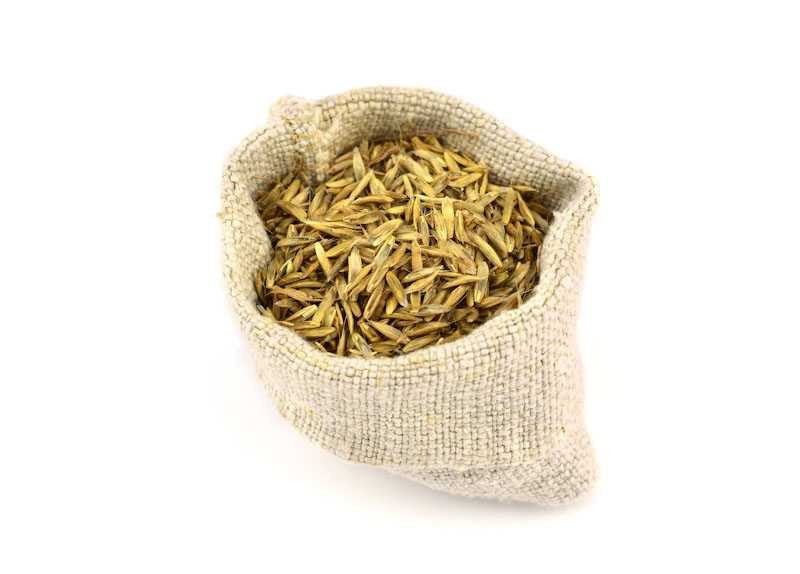
Ryegrass (Lolium spp.) is primarily known as a forage grass and not commonly used for flour production. However, just like dandelion roots, ryegrass was used to produce flour in times of scarcity and famine.
Where to find in the United States: Ryegrass is a cool-season grass commonly used in lawns and pastures and as a cover crop. It is widely distributed in the United States, especially in temperate regions. Ryegrass has flat, linear leaves with a prominent midrib. The grass produces seed heads with spikelets arranged in a distinctive pattern. The seeds are the parts used for flour. If considering using ryegrass seeds for flour, harvesting would typically occur when the seed heads have matured and turned golden brown.
Flour-making process: The seeds would need to be threshed from the seed heads, cleaned, and then ground into flour using a grain mill or high-powered blender.
Notes: Ryegrass is primarily used as a forage grass for livestock and as a cover crop to prevent soil erosion. There may be potential challenges or limitations to using ryegrass seeds for human consumption, so this is an alternative that should be used only during times when food is scarce.
Acorns
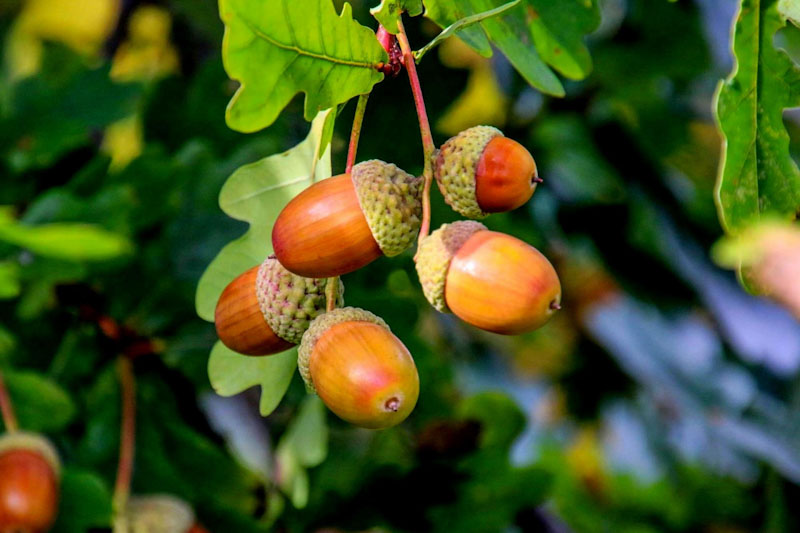
Acorns have a long history of traditional use as a food source by various indigenous peoples across North America. Native American communities utilized acorns as a staple in their diets, processing them into flour through a careful series of steps. The native tribes developed methods to leach out the bitter tannins present in acorns, making them palatable and safe for consumption. The resulting acorn flour was then used in various recipes. Today, there is a growing awareness of the potential of acorns as a nutritious and sustainable food source, leading to increased interest in their culinary applications, including the production of acorn flour.
Where to find in the United States: Acorns come from oak trees (Quercus), which are widespread throughout the United States. Various oak species produce acorns, making them common in forests, woodlands, and urban areas with oak trees. Oak trees are deciduous and have distinctive lobed leaves. Acorns are the nut-like seeds produced by oak trees and are characterized by their cap (the cupule) and the nut (the seed) itself. The nut or seed inside the acorn is used to make flour.
Harvest acorns in the fall when they have fallen from the tree. Choose acorns that are free of holes, cracks, or other signs of damage. It’s essential to leach out the tannins, bitter compounds present in acorns, before using them for flour. This can be done by soaking or boiling.
Flour-making process:
Shelling: Remove the shells from the acorns to access the inner nut.
Leaching: To remove tannins, either soak the acorns in water for an extended period or boil them. Change the water several times until it is no longer bitter.
Drying: After leaching, dry the acorns thoroughly to prevent mold.
Grinding: Grind the dried acorns into flour using a grain mill or a high-powered blender.
Notes: Acorn flour has a nutty flavor and can be used in baking, pancakes, and other recipes. It’s crucial to leach out tannins, as they can be toxic and bitter, ruining the flour. Different oak species produce acorns with varying levels of bitterness, so experimentation may be necessary to find the best-tasting acorns.
While acorns have been historically used for food by various cultures, it’s essential to follow proper leaching procedures to make them safe for consumption. Those with nut allergies should consult their doctor before consuming acorn flour.
A quick note on foraging
As an experienced forager and promoter of this ancient skill, I cannot help but stress a few guidelines that are a must for every forager. Take care of yourself and take care of nature when harvesting and using wild plants. Please make sure you follow these steps:
Positive Identification: Ensure accurate identification of the plant before harvesting. Use reliable field guides or seek guidance from experienced foragers. Be cautious of look-alike plants, and note distinctive features for accurate identification.
Harvesting Ethics: Respect local regulations and private property rights. Obtain permission before foraging on private land. Harvest in moderation to maintain the health of plant populations and ecosystems. Consider the sustainability of foraging practices. Avoid overharvesting and choose abundant species.
Seasonal Timing: Be aware of the plant’s growing season and when its edible parts are at their peak. This can vary for leaves, flowers, seeds, or roots.
Plant Health: Choose plants that appear healthy and vibrant. Avoid harvesting from areas with pollution, chemical treatments, or potential contaminants.
Sustainable Practices: Consider the sustainability of foraging practices. Avoid overharvesting and choose abundant species.
Hygiene and Safety: Wash harvested plants thoroughly to remove dirt, insects, or contaminants. Be aware of any potential allergies or toxic look-alike plants. If uncertain, consult with experienced foragers or experts.
Tool Selection: Use appropriate tools for harvesting, such as scissors or a knife. Minimize damage to the plant and surrounding vegetation.
Environmental Impact: Tread lightly to minimize impact on the ecosystem. Stay on designated paths and avoid trampling delicate plants. Consider the ecological role of the foraged species in its natural habitat.
Concluding
So, there you have it—the plants that you can turn into flour to have a viable alternative to the all-purpose flour you’re used to buying from the local grocery store. Almost all of these plants can be found in the wild, and they are free to take as long as you follow the guidelines we’ve listed above.


